Effective Methods for Washing Green Beans: A Complete Kitchen Guide
Learn effective methods for washing green beans like a pro. Discover step-by-step techniques, vinegar rinses, drying tips, and storage advice to keep your green beans clean, safe, and delicious.
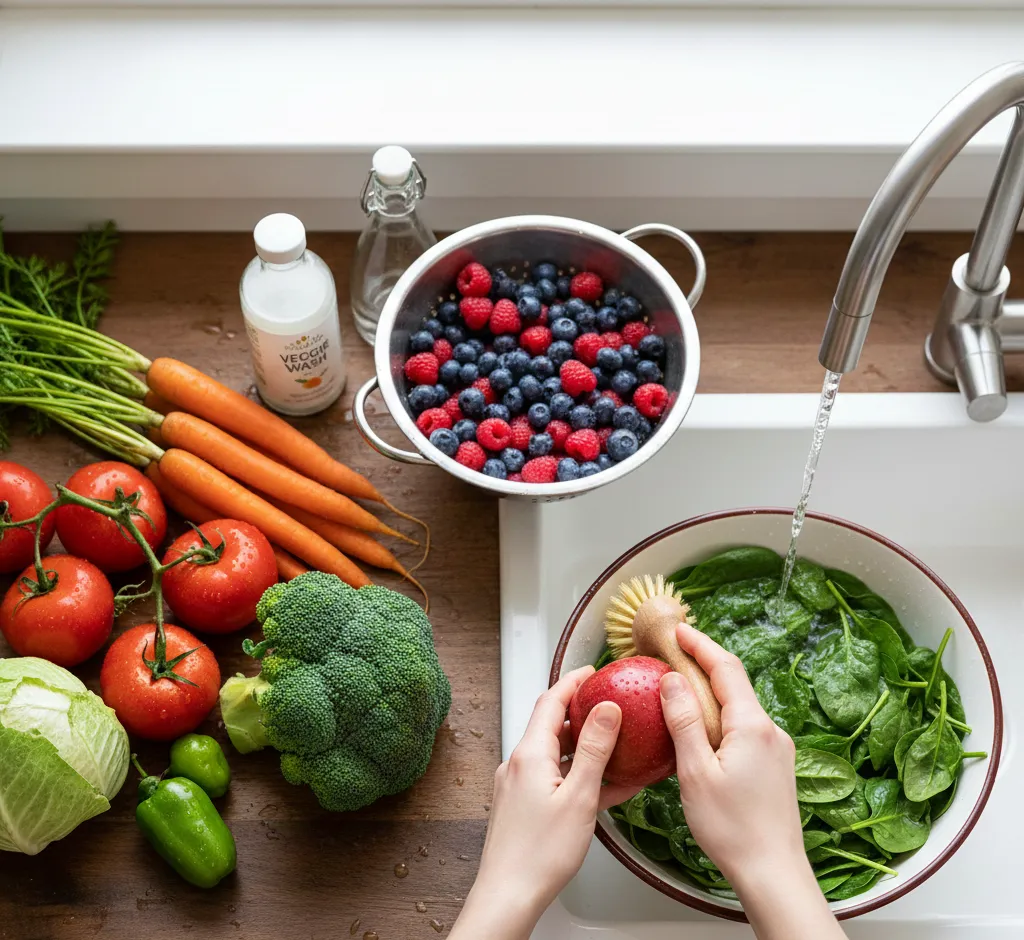
Green beans are a delicious, versatile, and nutritious vegetable that can be used in everything from simple side dishes to hearty casseroles and salads. However, before you cook or eat them, it is essential to wash them properly. Effective washing removes dirt, sand, pesticides, and potential bacteria, helping you protect your health and improve the overall quality of your meals.
This comprehensive guide explains step-by-step how to wash green beans the right way, which methods to use in different situations, and what mistakes to avoid. Whether you are a beginner in the kitchen or an experienced home cook, these techniques will help you clean green beans quickly, safely, and efficiently.
Why Properly Washing Green Beans Matters
Green beans often travel a long way from farm to table. During this journey, they can pick up soil, dust, tiny stones, insects, and residues from pesticides or fertilizers. Even if the beans look clean on the surface, there may still be invisible contaminants.
Proper washing is important for several reasons:
- Food safety: Rinsing helps reduce bacteria and other microorganisms on the surface of the beans.
- Removing dirt and grit: Thorough washing keeps unpleasant sand or soil from ending up on your plate.
- Reducing pesticide residues: Many green beans are treated with crop protection products; washing can significantly reduce these traces.
- Better taste and texture: Clean beans cook more evenly and taste fresher.
- Improved appearance: Clean, bright beans simply look more appetizing.
While washing does not make spoiled beans safe to eat, it is a crucial step for preparing fresh produce properly.
Choosing and Preparing Green Beans Before Washing
Good washing starts with good selection. When you pick green beans at the store, farmers' market, or garden, choose beans that are firm, crisp, and vibrant green. Avoid beans that are limp, wrinkled, heavily blemished, or have soft, dark spots.
Sort and Trim Before You Wash
Before rinsing, take a moment to sort and trim your green beans. This makes washing easier and more effective.
- Sort the beans: Spread the beans out on a clean surface and remove any that are moldy, slimy, or badly bruised.
- Remove stems: Pinch off or cut the tough stem end (the side that was attached to the plant). The pointed tip at the other end is usually edible and can be left on, but you can trim it for appearance if you like.
- Check for strings: Most modern varieties are “stringless,” but if you notice a tough string along the side, gently pull it off while trimming.
Once sorted and trimmed, your beans are ready for thorough cleaning.
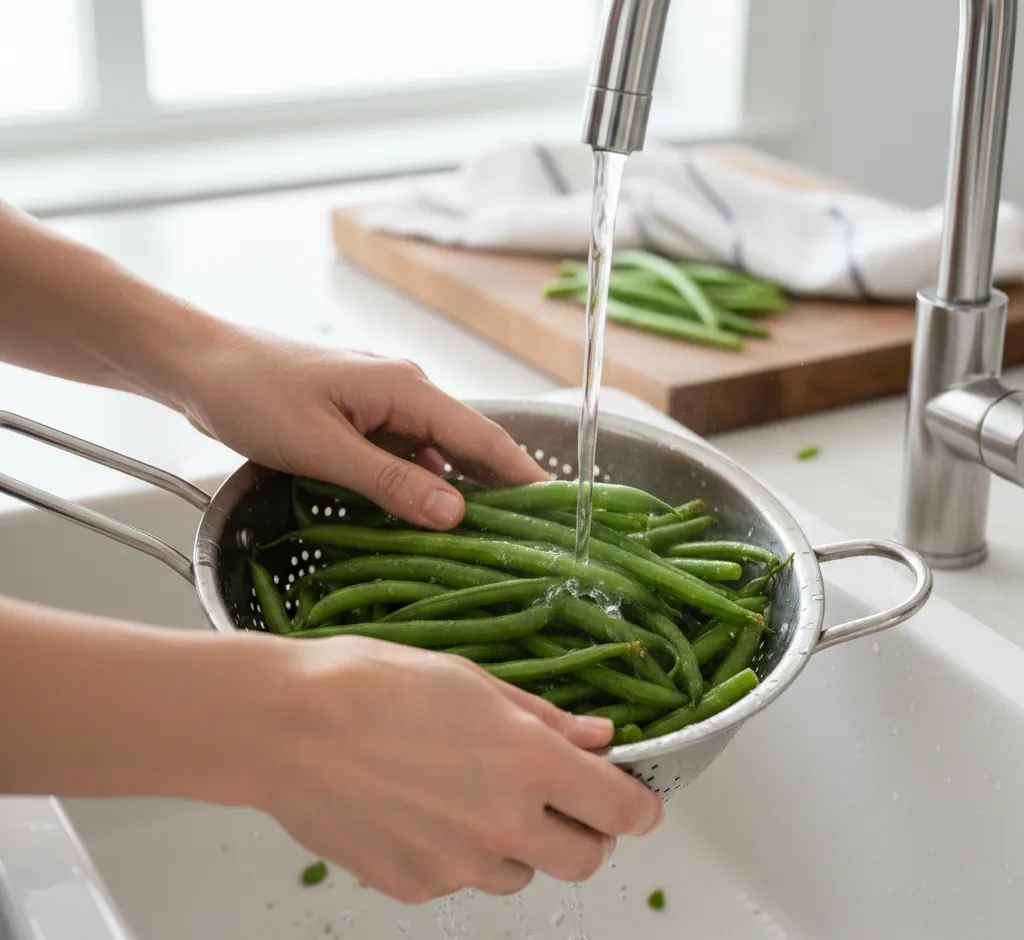
Basic Method: Rinsing Green Beans Under Running Water
For everyday cooking, rinsing green beans under cool running water is usually sufficient. This method is quick, simple, and effective for removing most dirt and debris.
Step-by-Step Instructions
- Use a colander: Place the green beans in a large colander or mesh strainer. This allows water to flow around and through the beans.
- Turn on cool water: Use cool or slightly cold water. Very hot water is unnecessary and might slightly affect texture.
- Rinse thoroughly: Move the beans around with your hands, lifting and turning them so every side gets rinsed. Pay extra attention if you see any visible dirt.
- Rub gently: Lightly rub the beans between your fingers to help remove stuck-on soil or residues.
- Inspect while rinsing: As you wash, check for hidden damaged spots, insects, or small stones, and discard any questionable beans.
- Drain well: Shake the colander to remove excess water, and let the beans drain for a minute or two.
This basic method works best for beans that are relatively clean and will be cooked shortly after washing.
Soaking Method: For Very Dirty or Garden-Fresh Beans
Green beans straight from the garden or from a farmers' market can carry more soil or sand. In these cases, a soaking method helps loosen stubborn dirt and small insects that hide between beans.
How to Soak Green Beans Safely
- Fill a large bowl: Use a clean bowl or basin and fill it with cool water. Make sure there is enough space for the beans to move freely.
- Add the beans: Place the sorted and trimmed beans into the water and gently push them down so all are submerged.
- Swish them around: Use your hands to swirl the beans around in the water. This movement dislodges dirt and grit, which will settle at the bottom of the bowl.
- Soak briefly: Let the beans sit for 5–10 minutes. Avoid very long soaking, which can affect texture.
- Lift, don’t pour: Instead of dumping everything through a colander, lift the beans out of the water with your hands or a slotted spoon. This keeps the dirt, which has sunk to the bottom, in the bowl.
- Rinse again: Place the beans in a colander and give them a final rinse under running water to remove any remaining residue.
This method is especially helpful after heavy rain in the garden or when beans look dusty or sandy.
Using Vinegar to Reduce Surface Bacteria
Some home cooks like to add a mild vinegar solution to help reduce surface bacteria on fresh produce. While vinegar does not sterilize food, it can lower the number of microbes on the surface and may help dissolve some pesticide residues.
Vinegar Wash Method
Use this approach when you want an extra level of cleanliness, for example when preparing green beans for salads, raw preparations, or for people with sensitive immune systems (keeping in mind that green beans are usually cooked).
- Prepare a solution: Mix 1 part white vinegar with 3 parts cool water in a large bowl. For example, use 1 cup of vinegar and 3 cups of water.
- Add the beans: Place the trimmed green beans into the solution and gently stir them around.
- Short soak: Let the beans sit in the mixture for 5–10 minutes. There is no need to soak longer.
- Rinse thoroughly: Transfer the beans to a colander and rinse well under cool running water to remove the vinegar taste.
- Drain and dry: Let the beans drain completely before cooking or storing.
Choose plain white vinegar for this method; it is inexpensive and has a neutral flavor once rinsed away.
Should You Use Dish Soap or Special Produce Wash?
Many people wonder whether they should wash fruits and vegetables, including green beans, with dish soap or special cleaners. Food safety authorities generally advise against using dish soap or harsh chemicals on produce.
Here’s why:
- Dish soap is not meant for ingestion: Residues can cling to the surface and are difficult to rinse off fully.
- Chemical cleaners can be unsafe: Some products contain ingredients not approved for contact with food.
- Clean water works well: Studies show that running water and gentle rubbing remove most surface dirt and organisms.
Special “produce washes” are available on the market, but plain water, or water with a bit of vinegar, is usually enough. If you choose a commercial produce wash, follow the instructions carefully and rinse thoroughly afterward.
Drying Green Beans After Washing
Drying may not seem important if you plan to boil or steam your beans, but removing excess water can improve texture and make certain recipes turn out better. It is especially useful when roasting, sautéing, or stir-frying green beans, because water causes oil to splatter and can prevent browning.
Simple Drying Techniques
- Shake in the colander: After rinsing, shake the colander firmly to remove as much water as possible.
- Pat with a kitchen towel: Spread the beans on a clean kitchen towel or paper towels. Gently pat them dry, rolling the beans lightly to remove moisture.
- Air-dry briefly: If you have time, let the beans rest in a single layer for 10–15 minutes to air-dry before cooking.
Dry beans sear and roast more evenly, giving you a more flavorful and attractive result.
Washing Green Beans for Different Cooking Methods
The basic washing techniques stay the same, but you can slightly adjust the process depending on how you plan to cook your green beans.
For Blanching and Freezing
If you want to preserve green beans by freezing them, proper washing is the first step in the process. Clean beans freeze better and maintain higher quality over time.
- Wash thoroughly: Use the soaking method if beans are very dirty, followed by a good rinse.
- Trim and cut: After washing, cut the beans into the desired length, usually halves or thirds.
- Blanch: Boil the beans in salted water for 2–4 minutes, depending on thickness, then plunge them into ice water to stop cooking.
- Dry completely: Drain well and pat dry before placing the beans in freezer-safe bags or containers.
Removing as much surface water as possible helps prevent ice crystals and freezer burn.
For Stir-Frying and Roasting
Stir-frying and roasting rely on high heat and relatively dry surfaces.
- Wash and then dry thoroughly: Follow the rinsing method, then make sure the beans are well dried with a towel.
- Avoid overcrowding while drying: Spread beans in a single layer so moisture can evaporate.
- Cook promptly: Use the beans soon after washing and drying to keep them crisp and fresh.
For Steaming and Boiling
Because steaming and boiling involve water, perfect dryness is less critical, but cleanliness still matters.
- Rinse well: A thorough rinse under running water is usually enough.
- Inspect one last time: As you add beans to the pot, quickly check for any remaining damaged pieces or stems.
How to Store Washed Green Beans
Sometimes you will want to wash green beans in advance to save time later. Proper storage helps maintain freshness and prevent mold or sliminess.
Short-Term Storage in the Refrigerator
Green beans stay freshest when they are dry and cool, with a little air circulation.
- Dry thoroughly: Make sure the beans are as dry as possible after washing.
- Use a breathable container: Place the beans in a container lined with a paper towel or in a perforated plastic bag. Avoid airtight containers that trap moisture.
- Store in the crisper drawer: Keep them in the vegetable drawer, where humidity levels are more suitable.
- Use within a few days: For best quality and flavor, cook washed beans within 3–5 days.
Should You Wash Before or After Storing?
Green beans generally keep longer if they are stored unwashed and washed just before cooking. If you wash them ahead of time, be extra careful to dry them thoroughly and check regularly for any signs of moisture buildup or spoilage.
Common Mistakes to Avoid When Washing Green Beans
A few small errors can reduce the effectiveness of washing or affect the quality of your green beans. Avoid these common mistakes:
- Soaking for too long: Extended soaking can make beans waterlogged and affect their crunch and flavor.
- Using very hot water: Hot water can start to soften the beans and may reduce their freshness.
- Skipping the final rinse: If you use a vinegar solution or produce wash, always rinse well afterward.
- Storing while still wet: Excess moisture encourages mold, sliminess, and faster spoilage.
- Neglecting to inspect: Even after washing, damaged or spoiled beans should be discarded, as washing cannot fix spoilage.
Frequently Asked Questions About Washing Green Beans
1. Do I need to wash pre-packaged or trimmed green beans?
Even if green beans come in a sealed bag or are labeled as “pre-washed,” it is still a good idea to rinse them briefly under cool running water. This quick step gives you peace of mind and removes any remaining residues from processing or packaging.
2. Can green beans be eaten raw after washing?
Many people enjoy raw green beans in salads or as a crunchy snack. After thorough washing, raw beans are generally safe for most healthy adults. However, cooking helps soften the texture, enhance flavor, and further reduce potential bacteria. People with weakened immune systems, young children, pregnant individuals, or the elderly may prefer cooked beans for added safety.
3. How can I tell if green beans have gone bad?
Washing cannot restore spoiled beans. Discard green beans if they:
- Feel slimy or sticky.
- Have mold, dark soft spots, or an unpleasant smell.
- Are very limp, wrinkled, and unevenly discolored.
Always check beans both before and after washing, and when in doubt, throw them out.
4. Is it safe to wash green beans in advance for meal prep?
Yes, you can wash green beans a day or two ahead as part of meal prep, as long as you dry them well and store them correctly in the refrigerator. Use them within a few days to enjoy their best flavor and texture.
Step-by-Step Summary for Effective Green Bean Washing
To bring everything together, here is a quick summary of an effective washing routine you can use every time:
- Sort: Remove any beans that are spoiled, moldy, or severely damaged.
- Trim: Cut off the stem ends and remove any strings if necessary.
- Rinse or soak: Use running water for lightly soiled beans, and a short soak in cool water for very dirty beans.
- Optional vinegar wash: For an extra step, use a mild vinegar solution, then rinse thoroughly.
- Drain: Place beans in a colander to let excess water drip off.
- Dry: Pat dry with a clean towel, especially if roasting, stir-frying, or storing.
By following this routine, you ensure that your green beans are clean, safe, and ready to shine in any recipe.
Final Thoughts
Washing green beans properly does not need to be complicated or time-consuming. With a few simple habits—sorting carefully, using cool water, rinsing thoroughly, and drying well—you can greatly improve both the safety and the quality of your meals. Whether you are cooking a quick weeknight side dish, preparing a holiday casserole, or freezing a big batch from the garden, clean green beans are the foundation of delicious results.
Make these effective washing methods part of your regular kitchen routine, and every green bean dish you prepare will benefit from cleaner, fresher, and more flavorful ingredients.