How to Assemble an IKEA Office Chair: Step‑by‑Step Beginner’s Guide
Learn how to assemble an IKEA office chair step by step with this detailed, beginner-friendly guide. Discover essential tools, assembly tips, adjustments, and maintenance for a safe and comfortable setup.
Assembling an IKEA office chair for the first time can feel a bit intimidating, especially when you unfold the instruction sheet and see dozens of icons and parts. The good news is that most IKEA office chairs follow a similar assembly process, and with a clear, step‑by‑step guide, you can put everything together safely and correctly in under an hour.
This detailed guide will walk you through how to assemble an IKEA office chair from start to finish. We will cover preparation, parts, safety tips, and common mistakes to avoid, so your chair is comfortable, stable, and ready for everyday work.
Before You Start: Preparation and Safety
Choose the Right Workspace
Pick a clean, flat, and spacious area where you can spread out all the parts. A living room floor or a clear office space works well. If you have hard flooring, place a rug, cardboard, or a blanket underneath to avoid scratching the floor or damaging chair components.
Check the Package Contents
Before assembling, open the box carefully and lay out all pieces. Compare them with the parts list in the IKEA manual for your specific chair model. Most IKEA office chairs contain:
- Seat base with cushioning
- Backrest
- Chair base (usually a 5-star base)
- Gas lift (pneumatic cylinder)
- Plastic gas lift cover
- Casters (wheels), usually 5
- Armrests (2), if included in the model
- Mechanism plate (tilt and height mechanism) with levers
- Various screws, washers, and bolts
- Plastic caps or covers for a clean finish
Make sure nothing is missing or damaged. If you find an issue, contact IKEA customer service before continuing.
Gather the Necessary Tools
Many IKEA office chairs include the required tools (such as an Allen key). However, having a few extra tools nearby can make assembly easier and faster:
- Phillips screwdriver (if screws require it)
- Flathead screwdriver for prying or adjusting plastic caps
- Rubber mallet to gently tap parts into place (optional)
- Soft cloth to protect visible surfaces while turning the chair over
Read the IKEA Manual Once
Even though IKEA manuals rely on images instead of words, it is helpful to look through all pages once before you begin. This gives you a clear overview of the order of steps and any model-specific details, such as different screw lengths or optional features like headrests.
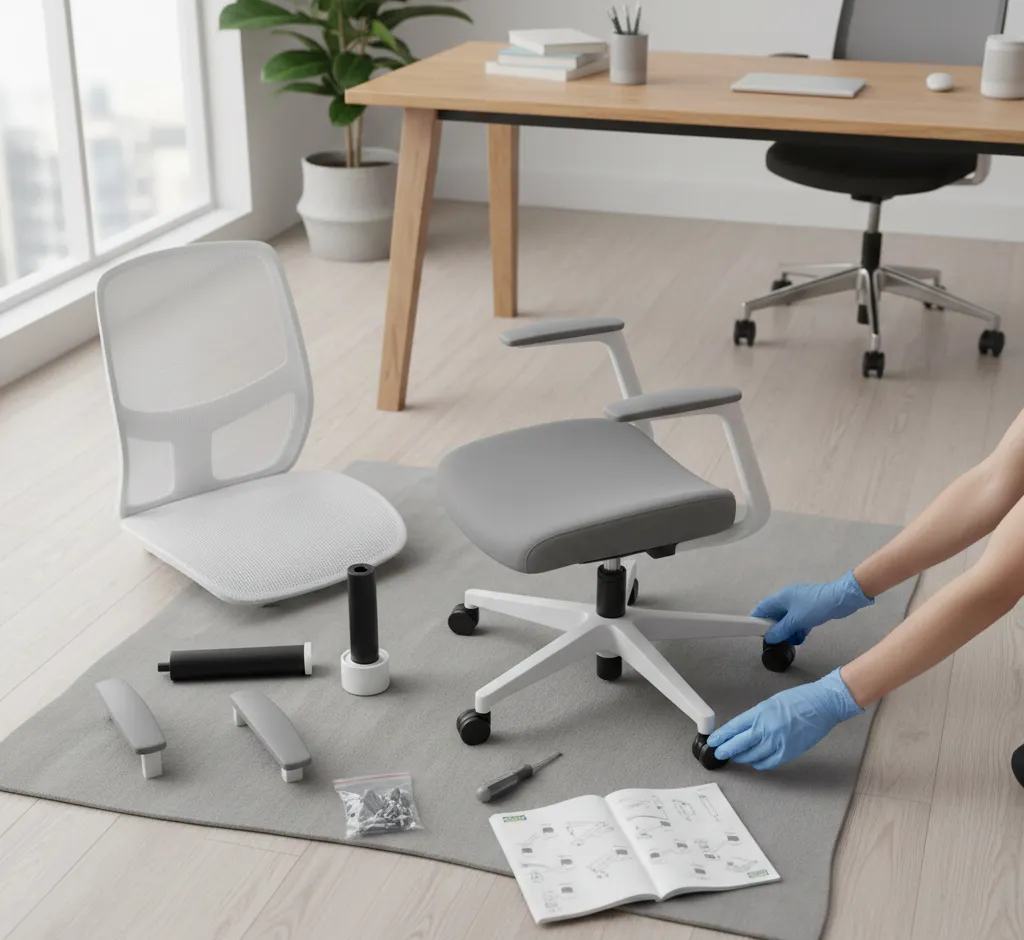
Step 1: Assemble the Chair Base and Wheels
Attach the Casters to the Base
The chair base is usually a 5-point (5-star) structure made of metal or durable plastic. Flip it upside down so the holes for the wheels face upward.
- Take one caster and align its metal stem with a hole on the base.
- Push firmly until you feel or hear a click. You might need to apply steady pressure; do not use excessive force that could crack the plastic.
- Repeat for all remaining casters until the base stands steadily on its wheels.
Once all casters are attached, flip the base right-side up and roll it gently to ensure the wheels rotate freely.
Insert the Gas Lift
The gas lift (pneumatic cylinder) lets your chair move up and down. Handle it carefully and avoid pressing the top until everything is assembled.
- Place the base on the floor with the casters touching the ground.
- Insert the wider end of the gas lift into the center hole of the base.
- Slide the plastic cover (if included) over the cylinder to hide the metal later.
There are usually no screws at this stage; the gas lift is secured by weight and friction once the seat is installed.
Step 2: Prepare the Seat Mechanism
Identify the Mechanism Plate
The mechanism plate is the metal piece that attaches under the seat and controls height and tilt. It often has one or two levers sticking out.
Place the seat cushion upside down on a clean surface so the bottom faces upward. Ensure you do not damage the upholstery.
Align the Mechanism Plate with the Seat
You will see pre-drilled holes in the underside of the seat. Align the mechanism plate so that:
- The lever(s) point toward the right-hand side when you are sitting in the chair.
- The larger, central round opening lines up with the center of the seat, where the gas lift will be inserted later.
Attach the Mechanism Plate
- Choose the correct screws based on the manual. IKEA usually labels them with letters (e.g., A, B, C) or lengths.
- Insert screws loosely into each hole first to ensure proper alignment.
- Once all screws are in place, tighten them firmly in a diagonal pattern (e.g., top-left, bottom-right, top-right, bottom-left) to distribute pressure evenly.
Do not overtighten screws to avoid stripping the holes, especially if the seat uses particleboard.
Step 3: Attach the Backrest
Locate the Backrest Bracket
Depending on the model, the backrest may attach directly to the mechanism plate or connect through a separate metal bracket.
Check the manual to confirm where the backrest screws go. In many IKEA office chairs, there are clear metal brackets with aligned holes for the backrest bolts.
Align and Secure the Backrest
- Hold the backrest against the seat or bracket in the correct orientation (top at the top, curve matching your lower back).
- Insert the screws or bolts through the bracket into the pre-drilled holes in the backrest.
- Tighten each screw gradually, alternating between sides to keep the backrest straight.
Once attached, gently test the backrest by applying slight pressure to make sure it does not wobble.
Step 4: Install the Armrests (If Included)
Check Left and Right Markings
Many IKEA armrests are labeled "L" (left) and "R" (right). If not, use the IKEA drawing to match each armrest to the correct side. The armrest should curve or angle outward slightly for comfort.
Attach Armrests to the Seat
- Position the armrest against the side of the seat according to the manual.
- Align the screw holes in the armrest with the holes in the seat base or metal frame.
- Insert screws loosely at first to allow for minor adjustments.
- Once aligned, tighten all screws securely.
Repeat the process on the other side. When finished, both armrests should be symmetrical and firmly attached.
Step 5: Join the Seat with the Base
Position the Seat Over the Gas Lift
This step is easier if you have someone to help, but it is manageable alone if you move carefully.
- Place the assembled base (with wheels and gas lift) on a stable surface.
- Lift the seat assembly (seat, backrest, armrests, and mechanism plate) and center the mechanism’s central opening over the top of the gas lift.
- Lower the seat so the gas lift slides into the mechanism opening.
No additional screws are usually required here; the gas lift locks in place by pressure once you sit on the chair.
Settle the Chair
Carefully sit on the chair and gently move around to help the gas lift fully seat itself into the mechanism. Pull the height lever a few times to ensure the chair moves up and down smoothly.
Step 6: Adjustments and Fine-Tuning
Adjust Seat Height
Use the main lever to raise or lower the chair until your feet rest flat on the floor and your knees are at approximately a 90-degree angle. This position supports good posture and reduces strain on your lower back.
Adjust Backrest Tilt and Tension
Many IKEA office chairs allow you to adjust tilt or rocking tension:
- Use the tilt lever to lock or unlock the backrest angle.
- Turn the tension knob (usually found under the seat) to make reclining easier or firmer.
Test different settings while seated to find a position that supports your lower back without forcing you forward.
Adjust Armrest Height or Width (If Available)
Some models have height-adjustable or width-adjustable armrests.
- Raise or lower the armrests so your shoulders remain relaxed and your elbows stay close to a 90-degree angle while typing.
- If the armrests are too close to your body or too wide, adjust them according to the manual, using the screws or sliders provided.
Common Mistakes to Avoid
Mixing Up Screws and Bolts
IKEA includes different screw lengths and types in one package. Mixing them up is one of the most common reasons for unstable chairs.
- Always compare each screw to the manual’s diagram.
- Keep screws in separate small piles or containers, grouped by size and type.
Overtightening Screws
It is tempting to tighten screws as much as possible, but overtightening can strip the wood or damage metal threads.
- Stop tightening once you feel firm resistance.
- If using a power driver, set it to a low torque and finish tightening by hand.
Incorrect Orientation of Mechanism or Backrest
Attaching the mechanism plate or backrest in the wrong direction can cause levers to be on the wrong side or the chair to feel unbalanced.
- Always double-check the orientation before tightening screws.
- Remember: most levers should be on the right side when you are seated.
Skipping the Final Tightening Check
After the first assembly, some screws may still be slightly loose. This can cause creaking or wobbling when you sit down.
- After sitting in the chair and making adjustments, re-check all accessible screws.
- Retighten gently as needed to ensure everything is solid.
Maintenance Tips for Your IKEA Office Chair
Regular Tightening and Inspection
Over time, frequent use and movement can gradually loosen screws and bolts. To keep your IKEA office chair safe and comfortable:
- Inspect screws in the armrests, backrest, and mechanism every 3–6 months.
- Tighten any that feel loose using the original IKEA tool or a compatible screwdriver.
Protect the Wheels and Floor
Casters can collect dust, hair, and small debris, which can affect smooth rolling and scratch floors.
- Clean wheels occasionally with a cloth or a small brush.
- Consider using a chair mat, especially on wooden or delicate floors.
Clean Upholstery Properly
The cleaning method depends on whether your chair is fabric, mesh, or leather (real or faux):
- Fabric: Vacuum regularly and spot clean using mild soap and water.
- Mesh: Wipe gently with a damp cloth and avoid abrasive brushes.
- Leather or faux leather: Use a soft cloth and a suitable cleaner recommended for that material.
Frequently Asked Questions
How long does it take to assemble an IKEA office chair?
Most people can assemble a standard IKEA office chair in 30 to 60 minutes. If it is your first time or you are assembling a more complex model with a headrest and advanced adjustments, allow a bit more time.
Can I assemble the chair alone?
Yes, most IKEA office chairs are designed for one person to assemble safely. However, having another person help when attaching the backrest or lifting the seat onto the base can make the process easier and quicker.
What if a part is missing or damaged?
If you notice missing screws, casters, or damaged components, stop the assembly. Use the product name and article number from your receipt or manual and contact IKEA customer service or visit the store’s spare parts section. They usually replace missing parts at no extra cost.
Can I use third-party wheels or gas lifts?
Some users upgrade to softer wheels for hardwood floors or heavier-duty gas lifts. While this can work, always ensure the parts are compatible in size and load rating with your specific IKEA model. Using incompatible parts may void warranties or affect safety.
Final Thoughts
Learning how to assemble an IKEA office chair is straightforward once you break the process into simple steps: prepare your workspace, build the base, attach the mechanism and backrest, install armrests, and finally join everything together with the gas lift. Paying attention to screw types, orientation, and final tightening helps you end up with a chair that feels stable, supportive, and comfortable for daily use.
With this step-by-step guide beside your IKEA instruction sheet, you can assemble your office chair confidently, optimize it for ergonomics, and maintain it for long-lasting performance. Once you are done, adjust the height, tilt, and armrests to fit your body, and enjoy a workspace that fully supports your productivity.