How to Clean Garlic Cloves Safely: A Complete Step‑by‑Step Guide
Learn how to clean garlic cloves safely with this step-by-step guide. Discover the best tools, peeling methods, rinsing tips, and storage practices to keep your garlic fresh, flavorful, and safe for cooking.
Garlic is one of the most versatile and health‑boosting ingredients in the kitchen, but preparing it can sometimes feel messy or even risky if you are not careful. Learning how to clean garlic cloves safely helps you save time, reduce food waste, and avoid unnecessary cuts or contamination. This guide walks you through every step, from choosing the best bulbs to safely peeling, trimming, and washing garlic cloves for cooking, pickling, or storing.
Why Cleaning Garlic Cloves Properly Matters
At first glance, cleaning garlic may seem as simple as peeling away the skin. In reality, there are several important reasons to pay attention to how you handle and clean garlic cloves:
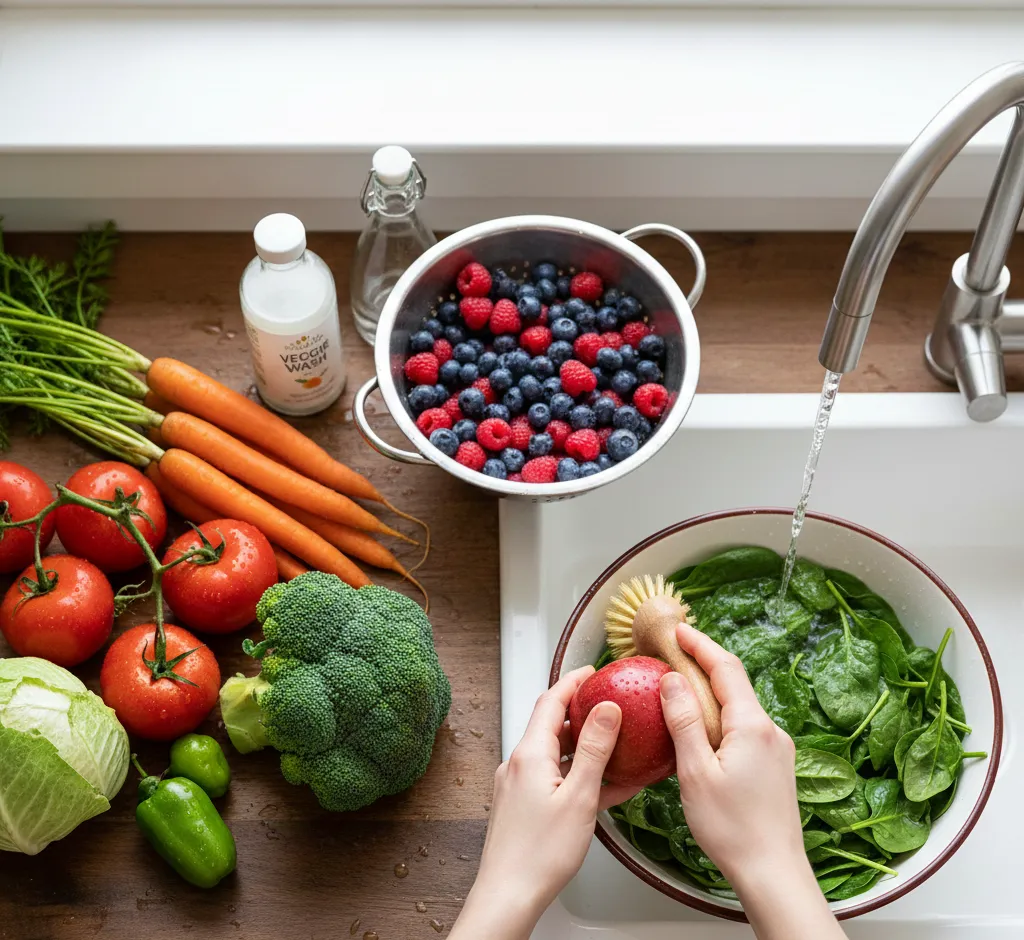
- Food safety: Dirt, soil, and microorganisms can cling to the outer skins and root end. Proper cleaning reduces the risk of transferring these to your food.
- Better flavor and texture: Removing sprouted or damaged parts prevents bitter or harsh flavors from affecting your dish.
- Knife safety: Garlic cloves are small and slippery, so safe handling techniques are essential to avoid accidental cuts.
- Longer shelf life: Cleaning and inspecting cloves helps you separate good garlic from spoiled cloves before storage or cooking.
By following a consistent cleaning routine, you ensure that your garlic is not only tasty but also safe to eat.
How to Choose Fresh, Safe Garlic Bulbs
Safe cleaning starts with good ingredients. Poor‑quality or old garlic is harder to clean and more likely to harbor mold or rot. When selecting garlic bulbs at the store or market, keep these points in mind:
- Check for firmness: Gently squeeze the bulb. It should feel firm and compact, not soft or hollow.
- Inspect the outer skin: Look for dry, papery skins that are intact. Avoid bulbs with damp, dark, or moldy patches.
- Avoid visible sprouting: Green shoots indicate age. Sprouted garlic is still usable, but the sprout can be bitter and the cloves tend to be drier.
- Smell the bulb: A fresh garlic bulb should have a mild garlic scent. An overly strong, sour, or musty smell can signal decay.
- Consider the variety: Hardneck garlic usually has larger, easier‑to‑peel cloves, while softneck garlic often stores longer but may have more numerous, smaller cloves.
Once you have selected good bulbs, store them in a cool, dry, and well‑ventilated place to maintain quality until you are ready to clean and use them.
Safety First: Tools and Hygiene
Before you start cleaning garlic cloves, prepare your workspace and tools. Good hygiene and safety habits help prevent cross‑contamination and accidents.
Recommended tools
- Cutting board (preferably non‑porous for easy cleaning)
- Sharp chef’s knife or paring knife
- Small bowl for cleaned cloves
- Clean kitchen towel or paper towels
- Optional: silicone garlic peeler tube or a lidded jar for shaking
Basic hygiene and safety tips
- Wash your hands with soap and water before and after handling garlic, especially if you are cooking for others.
- Clean your cutting board and knife before starting, and again if you switch from raw meat to garlic, or vice versa.
- Use a stable surface: Make sure the cutting board does not slide. Place a damp towel underneath if needed.
- Cut away from your fingers: Keep fingertips curled in and use a controlled, steady motion with the knife.
- Dispose of scraps promptly: Papery skins, stems, and damaged pieces should go into a compost bin or trash to keep your workspace tidy.
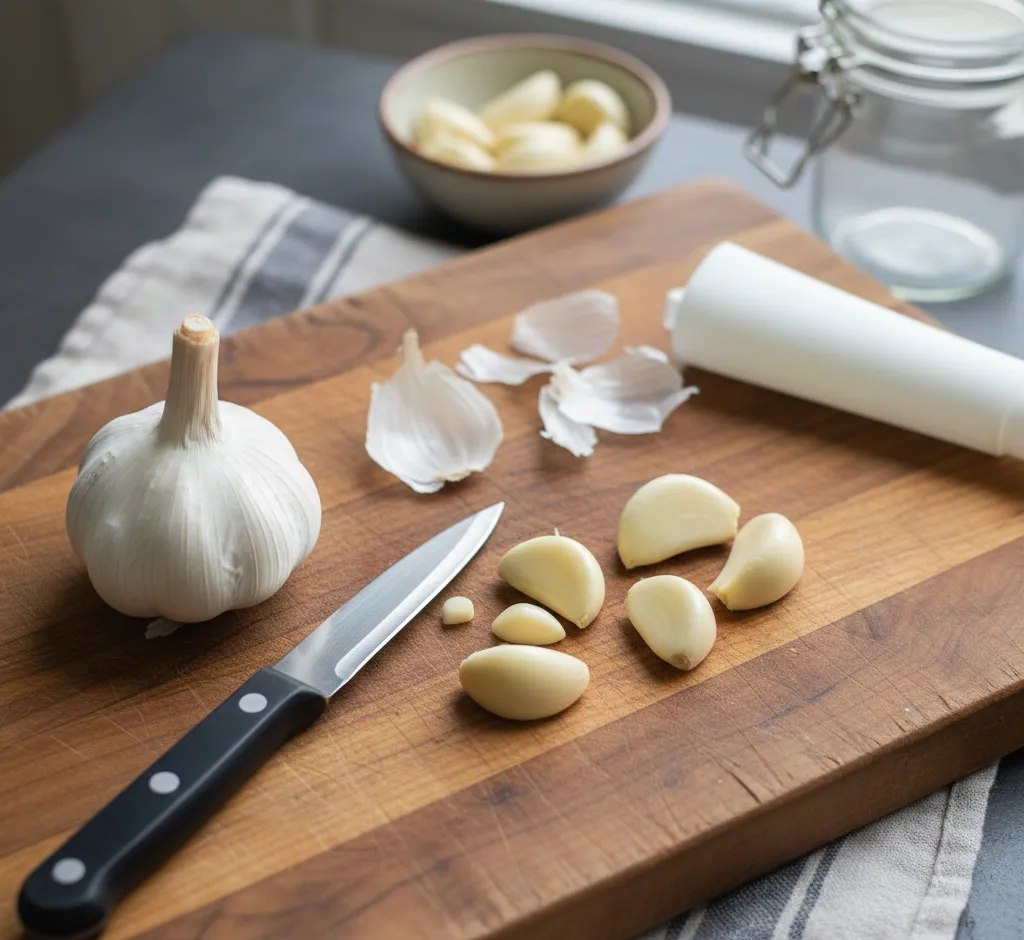
Step‑by‑Step: How to Break Apart and Clean Garlic Cloves
The cleaning process starts by separating the cloves from the bulb, then peeling and trimming them safely. Follow these steps for consistent, clean results.
Step 1: Separate cloves from the bulb
- Place the bulb on the cutting board with the root end facing down. This gives you a stable base.
- Press gently on the top of the bulb with the palm of your hand to loosen the cloves slightly.
- Break off individual cloves by pulling them away from the central stem. Discard any cloves that feel mushy, look shriveled, or show mold.
At this stage, you should have a pile of unpeeled cloves ready for further cleaning.
Step 2: Trim the root end safely
The root end is the firm, slightly rough base of each clove. Trimming it makes peeling easier and removes any dirty or dried‑out tissue.
- Lay one clove on its side on the cutting board, with the root end facing the knife.
- Use a small, sharp knife to cut off a thin slice of the root end. Avoid cutting too deeply; you want to remove only the tough base.
- Repeat with each clove, working slowly to maintain control of the blade.
Keep your non‑knife hand in a "claw" position with fingertips tucked under to reduce the risk of nicks.
Step 3: Choose a safe peeling method
There are several ways to peel garlic cloves. Some are faster, while others are gentler and better for keeping cloves intact. Below are three common methods, along with safety notes for each.
Method A: Peel by hand
This is the most precise method and is ideal when you want whole, undamaged cloves.
- Place the clove on the board and lightly press it with your fingers to loosen the skin.
- Use your fingers to pick at the cut root end and pull away the papery skin.
- Continue peeling until the clove is completely free of skin, then transfer it to a clean bowl.
Although this method can be slightly slower, it requires minimal force and gives you excellent control, reducing the chance of slips.
Method B: Gentle knife smash (with caution)
The knife‑smash method makes peeling much faster, but you must use it carefully to stay safe.
- Lay the clove flat on the cutting board.
- Place the flat side of the knife blade on top of the clove, with the sharp edge facing away from you.
- Press down firmly with the heel of your hand until you hear a small crack. Do not slam your hand or strike forcefully.
- Lift the knife and remove the loosened skin with your fingers.
This method slightly crushes the clove, which can be helpful if you plan to mince or chop it. Ensure your hand never presses directly on or near the sharp edge.
Method C: Shake in a jar or bowl
This hands‑off approach is useful when you need to peel a large quantity of garlic at once.
- Place several cloves with trimmed root ends into a lidded jar or between two metal bowls.
- Cover tightly to prevent cloves from escaping.
- Shake vigorously for 15–30 seconds. The friction will loosen and remove many of the skins.
- Open the container and separate peeled cloves from loose skins. Repeat if necessary.
While this method reduces direct knife contact, handle the container firmly to avoid dropping it, and check that all skins are fully detached before moving on.
Should You Wash Garlic Cloves?
Whether to rinse garlic cloves is a common question. In most cases, garlic is cooked at high temperatures, which reduces surface microbes. However, a quick rinse can help remove any remaining dust, soil, or loose skin particles.
When rinsing garlic is helpful
- When cloves are visibly dusty or dirty after peeling.
- When you plan to use garlic raw in dressings, dips, or salads.
- When garlic has been stored in a very dry or dusty area, and skins leave residue on the cloves.
How to rinse garlic cloves safely
- Place peeled cloves in a small colander or sieve.
- Run cool water over the cloves, gently rubbing them with clean fingers to remove any remaining debris.
- Dry thoroughly by patting the cloves with a clean kitchen towel or paper towel.
Drying is important. Excess surface moisture can dilute flavors when sautéing and may encourage spoilage if you plan to store the garlic for later use.
Inspecting Garlic for Spoilage and Safety
During the cleaning process, always check your garlic for signs of spoilage. Using spoiled garlic can negatively affect both safety and flavor.
Signs your garlic is no longer safe to use
- Soft or mushy texture: Fresh garlic should feel firm. Mushiness suggests decay.
- Dark spots or mold: Black, green, or fuzzy patches indicate mold growth. These cloves should be discarded.
- Strong, sour, or off smells: While garlic is naturally pungent, a sour or musty odor is a warning sign.
- Excessive sprouting: A small green sprout can be removed, but cloves that are mostly sprout and have shriveled flesh are better discarded.
If several cloves from the same bulb are spoiled, it is safest to discard the entire bulb. Do not try to cut away moldy parts and use the rest, as microscopic spores may have spread deeper into the clove.
How to Clean Garlic for Different Uses
Depending on how you plan to use your garlic, you may want to prepare it in slightly different ways. Here are safe cleaning and prep tips for common uses.
Cleaning garlic for cooking and sautéing
For most cooked dishes, you want clean, dry cloves that are ready to chop, slice, or mince.
- Follow the steps to trim, peel, and optionally rinse the cloves.
- Dry thoroughly to avoid excess moisture in hot oil or butter.
- Chop, slice, or mince on a clean cutting board, keeping fingers tucked in and knife movements controlled.
Remember to add garlic to hot oil with care; moisture on the cloves can cause oil to splatter. A dry, clean clove is safer and browns more evenly.
Cleaning garlic for raw dishes
When using garlic in uncooked dishes like vinaigrettes, sauces, or spreads, extra attention to cleanliness is important.
- Rinse peeled cloves under cool running water and pat them dry.
- Remove the green sprout from the center if present, as it can be bitter.
- Use a clean knife and board that have not just been used for raw meat or seafood.
These steps help keep your raw preparations fresh, flavorful, and as safe as possible.
Cleaning garlic for pickling or storing in oil (important safety note)
Garlic preserved in oil or low‑acid environments requires special care due to the risk of bacterial growth if not handled correctly.
- Use only fresh, firm cloves that have been carefully cleaned and inspected.
- Rinse and dry thoroughly, making sure there is no surface water left on the cloves.
- Follow tested, reputable recipes that include proper acidification and refrigeration instructions.
- Store homemade garlic‑in‑oil mixtures in the refrigerator and use them within the time frame recommended by food safety guidelines.
Never store fresh garlic in oil at room temperature, as this can create an environment where dangerous bacteria may grow.
How to Clean Garlic Equipment Safely
After handling garlic, your tools and surfaces retain strong odors and traces of garlic oils. Cleaning these properly prevents lingering smells and cross‑contamination with other foods.
Cleaning knives and cutting boards
- Wash knives and boards in hot, soapy water immediately after use.
- Rinse thoroughly to remove soap residue.
- Sanitize cutting boards occasionally with a mild bleach solution or vinegar, especially if used for both garlic and raw meats.
- Dry completely before storing to prevent warping or bacterial growth.
Reducing garlic odors on hands and surfaces
- Wash hands with soap and warm water, paying extra attention to fingertips and around nails.
- Rub your hands on stainless steel (such as a spoon or sink) under running water to help reduce odor.
- Clean countertops with a gentle kitchen cleaner or a mixture of vinegar and water to remove odor and residue.
These simple steps keep your kitchen fresh and ready for your next cooking project.
Common Mistakes to Avoid When Cleaning Garlic
Even experienced cooks sometimes make small mistakes that can affect safety or quality. Being aware of these pitfalls helps you clean garlic more effectively.
- Using a dull knife: A dull blade requires more force and is more likely to slip, increasing the risk of cuts.
- Peeling too far in advance: Pre‑peeled garlic dries out quickly and may lose flavor or become susceptible to contamination if left at room temperature.
- Leaving wet cloves exposed: Rinsed garlic that is not dried and stored correctly can spoil more quickly.
- Ignoring bad cloves: One moldy or rotten clove can affect nearby cloves. Sorting and discarding damaged pieces is essential.
- Storing garlic in plastic bags: This traps moisture and encourages mold. Use breathable containers instead.
By avoiding these mistakes, you preserve both the flavor and the safety of your garlic.
How to Store Cleaned Garlic Safely
Once your cloves are cleaned, you may not use all of them at once. Proper storage keeps them fresh and safe for future meals.
Short‑term storage (same day or within 24 hours)
- Keep peeled cloves in a small, covered container in the refrigerator.
- Use within a day or two for the best flavor and texture.
- Label the container with the date so you know how long the garlic has been stored.
Longer‑term storage options
For longer storage, it is generally best to keep garlic in its whole, unpeeled bulb form. However, if you need to store peeled cloves longer, consider these options:
- Freezing: You can freeze peeled cloves in an airtight container or bag. The texture will change slightly, but they remain safe and usable for cooked dishes.
- Refrigeration: Store peeled cloves in a sealed container and use them within a week, checking for any signs of spoilage before use.
- Avoid room‑temperature oil storage: As noted earlier, never keep garlic in oil at room temperature due to safety risks.
Whole, unpeeled bulbs keep best in a cool, dark, and dry place with good air circulation. Avoid refrigerating whole bulbs unless you live in a very warm climate, as excess moisture can encourage sprouting.
Frequently Asked Questions About Cleaning Garlic Cloves
Do I have to remove the green sprout inside the clove?
The green sprout in older cloves is safe to eat but can taste bitter and slightly harsh. For the best flavor, especially in raw dishes, it is a good idea to cut the clove in half lengthwise and remove the sprout with the tip of your knife.
Is pre‑peeled garlic as safe as fresh garlic?
Pre‑peeled garlic sold in containers or vacuum packs can be convenient, but it has been handled more and may lose flavor more quickly. Always check the expiration date, inspect for off odors or slime, and store it according to the package instructions. When in doubt, choose whole bulbs and peel them yourself.
Can I soak garlic cloves in water to make peeling easier?
Soaking garlic in water can loosen the skins, but it also introduces extra moisture that can dilute flavor and potentially shorten storage life. If you do soak cloves briefly for easier peeling, dry them thoroughly afterward and use them soon.
How can I clean large quantities of garlic safely?
For large batches, combine methods: separate and trim all the cloves, then use the shaking‑in‑a‑jar technique to remove most skins. Follow up by hand to peel any remaining cloves. Work in small batches, keep your tools clean, and refrigerate peeled cloves promptly if you are not using them right away.
Conclusion: Clean Garlic Cloves Safely for Better Cooking
Cleaning garlic cloves safely is a simple but important part of home cooking. By choosing fresh bulbs, handling knives carefully, selecting a peeling method that suits your comfort level, and rinsing and drying cloves when needed, you create a strong foundation for flavorful and safe dishes. Regularly inspecting garlic for spoilage, storing it correctly, and keeping your tools and hands clean will make garlic preparation faster, safer, and more enjoyable.
With these step‑by‑step techniques, you can confidently clean garlic cloves for any recipe, whether you are making a quick weeknight meal or preparing a large batch of sauces or marinades. Over time, these safe habits will become second nature, and garlic will feel like one of the easiest ingredients in your kitchen to handle.