Raspberry Trellis Designs for Beginners: Easy DIY Guides to Boost Your Harvest
Discover simple raspberry trellis designs perfect for beginners. Learn step-by-step how to build H, T, and V trellises to support your raspberry plants, improve airflow, and maximize yields in your home garden.
Why Every Beginner Gardener Needs a Raspberry Trellis
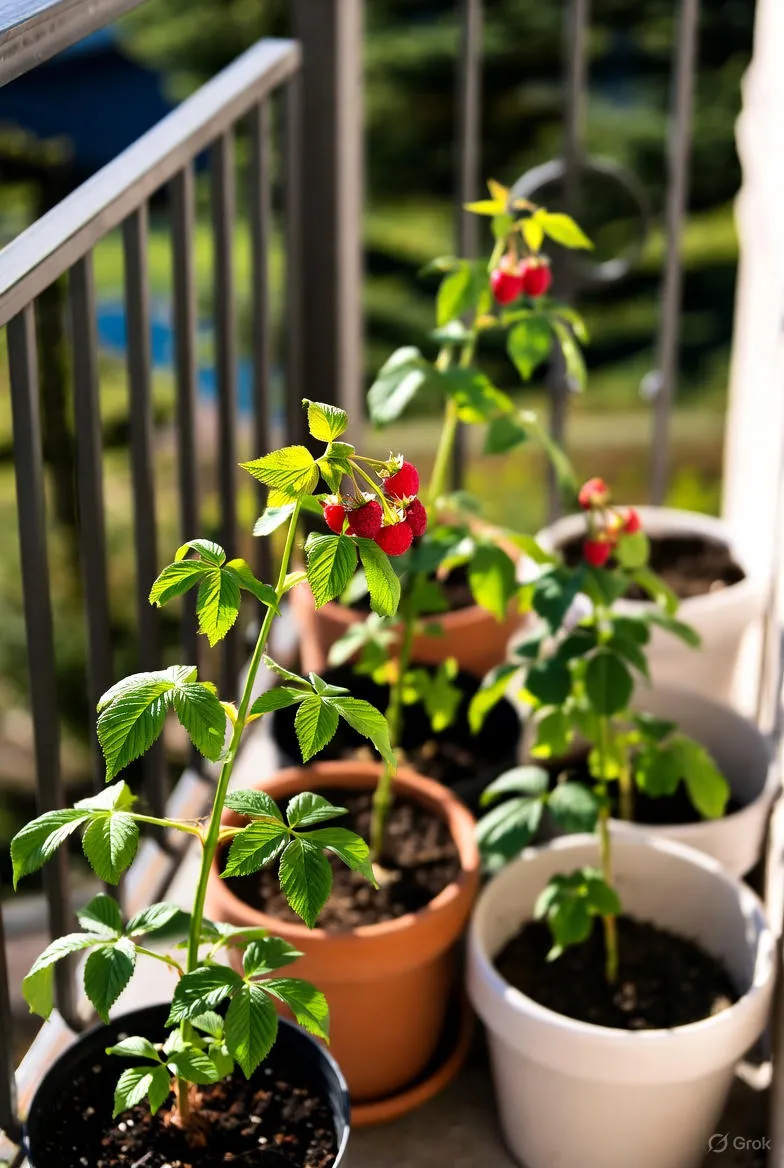
Raspberries are one of the most rewarding fruits to grow in a home garden. Their juicy, sweet berries burst with flavor straight from the vine, and with minimal care, they can produce abundantly for years. However, without proper support, raspberry canes can become unruly tangles, leading to broken branches, reduced yields, and even disease issues from poor airflow. This is where a trellis comes in—a simple structure that lifts and organizes the canes, making your raspberry patch easier to manage, harvest, and admire.
For beginners, choosing the right trellis design doesn't have to be overwhelming. Raspberries grow tall, often reaching 5 to 6 feet, and their biennial canes (primocanes in year one, floricanes in year two) benefit from sturdy support against wind, snow, and their own weight when laden with fruit. A well-built trellis not only prevents flopping but also improves sunlight penetration and air circulation, which can cut down on fungal problems like anthracnose or botrytis. Plus, it simplifies pruning and picking, turning what could be a thorny chore into a pleasant garden ritual.
In this guide, we'll explore beginner-friendly designs, from the ultra-simple wire cage to more structured H and T shapes. Whether you have a small backyard bed or a row along a fence, these DIY projects use affordable materials and basic tools. By the end, you'll be ready to build a trellis that supports healthy growth and bountiful harvests.
Understanding Raspberry Growth Habits
Before diving into designs, it's helpful to know how raspberries grow. There are two main types: summer-bearing (floricanes fruit on second-year wood) and everbearing or fall-bearing (primocanes fruit in the first year). Both send up vigorous new shoots each spring, which arch over as they elongate. Without support, these canes sprawl across the ground, shading lower berries and inviting pests.
Trellises address this by providing horizontal wires or arms at varying heights—typically 18 inches, 3 feet, and 5 feet off the ground—to which you can tie or tuck the canes. This vertical training keeps the patch narrow (ideally 2-3 feet wide) for easy access from both sides. For beginners, start with everbearing varieties like 'Heritage' or 'Joan J,' as they require less precise pruning—just cut everything to the ground in winter.
Choosing the Right Trellis Design for Your Space
Not all gardens are the same, so pick a design that fits your setup. Here are three beginner-recommended options:
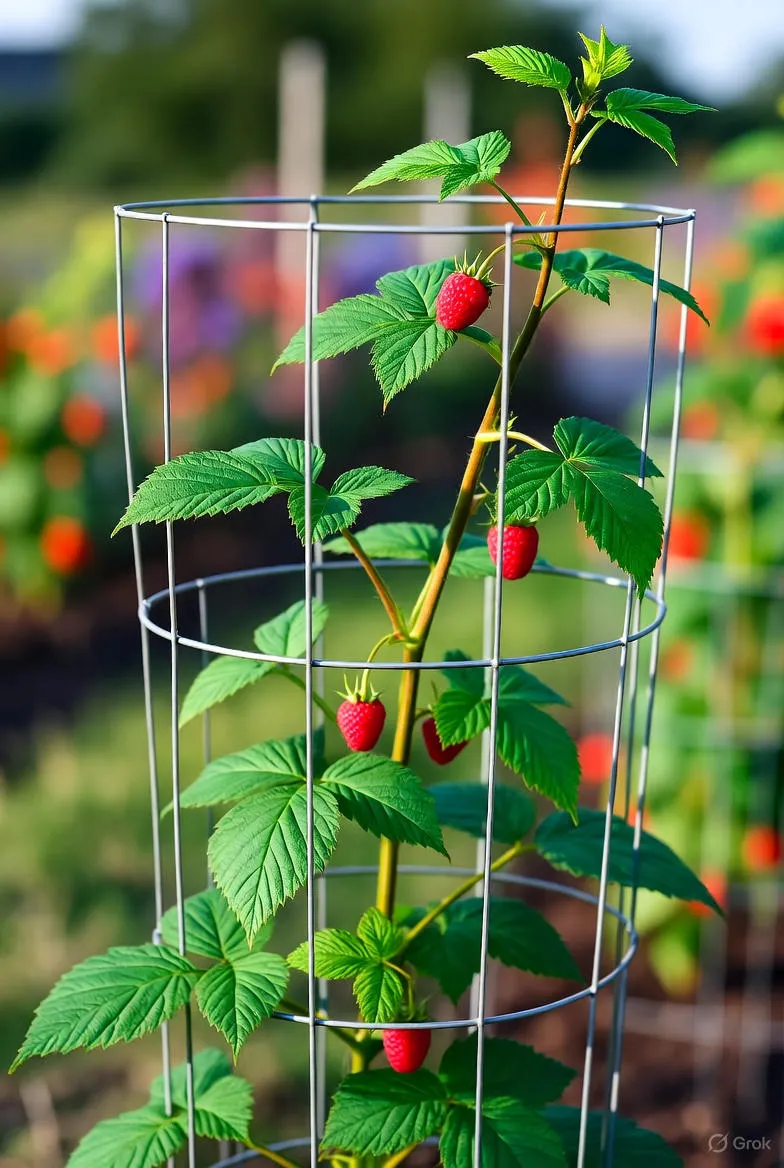
- Simple Wire Cage Trellis: Ideal for small patches or fence lines. It's the quickest to build and requires no woodworking skills.
- H-Shaped Frame Trellis: Perfect for wider beds (up to 4 feet). Offers robust support for autumn-fruiting raspberries without much tying.
- T-Trellis: Great for rows or larger plantings. Mimics a V-shape to separate new and old canes, boosting yields.
Each design costs under $50 for a 12-foot row and can last 5-10 years with basic maintenance. Let's break down the materials and steps for each.
Materials You'll Need: A Beginner's Shopping List
Most supplies are available at hardware stores or online. For all designs:
- Stakes or posts: 6-8 foot lengths of 2x2 or 4x4 treated lumber, or metal T-posts (rust-resistant).
- Wire: 10-12 gauge galvanized steel, about 50-100 feet depending on length.
- Fasteners: Eye screws, turnbuckles for tension, and zip ties or soft twine for tying canes.
- Tools: Mallet or post driver, drill, wire cutters, level, and screws (3-inch galvanized).
Optional add-ons like hose clamps or ferrules make installation sturdier. Total prep time: 30 minutes.
Building a Simple Wire Cage Trellis: Step-by-Step
This design creates a rectangular enclosure around your raspberry bed, confining growth without fancy joins. It's forgiving for first-timers and takes about 30 minutes.
- Outline your bed: Mark a 3x12-foot rectangle (or smaller). Lay down cardboard or old carpet as a weed barrier to keep shoots contained.
- Drive stakes: Hammer four 6-foot stakes into corners, 1 foot deep. Add one midway on longer sides if over 6 feet. Use a level to keep them plumb.
- String lower wire: At 18 inches high, wrap wire around a corner stake several times, stretch taut to the next, and secure. Repeat around the perimeter.
- Add upper wire: Near the top (5 feet up), do the same. For extra support, add a middle wire at 3 feet.
- Plant and train: Space raspberry crowns 18-24 inches apart inside the cage. As canes grow, gently tuck them behind wires—no tying needed initially.
Pro Tip: Prune canes to 6 feet tall a few times per season to maintain shape. This setup works wonders against fences, keeping depth to 18 inches for one-sided access.
Constructing an H-Shaped Frame Trellis: Detailed Guide
For a more permanent structure supporting wider beds, the H-trellis uses wooden frames connected by wires. It's stable in wind and ideal for 24-48 inch wide patches. Build time: 1-2 hours.
Materials for a 12-Foot Row
- 8 pieces 2x2 lumber, 6 feet long
- 4 pieces 2x2 lumber, 3 feet long
- 164 feet of 1.2mm galvanized wire
- 50-60 eyelet screws
- 8 galvanized 3-inch screws
Step-by-Step Construction
- Cut and assemble H-frames: For each of four frames, screw a 3-foot crossbar midway between two 6-foot uprights, forming an H. Pre-drill holes to avoid splitting.
- Install frames: Dig holes 18-24 inches deep, spaced 4 feet apart along the bed. Sink frames level with each other, backfill soil firmly.
- Attach horizontal wires: Screw eyelets into uprights at 1 foot, 3 feet from top, and 1 foot above ground. Thread wire through, twisting tight between frames for three rows per side.
- Add internal supports: On each H, run wires between uprights at 12 inches from top and bottom.
- Integrate plants: Let primocanes weave through as they grow. In fall, prune all to ground level through the structure.
This design shines for everbearing raspberries, as canes grow freely without seasonal tying. To prevent rot, sleeve buried wood in PVC pipe with drainage holes.
Creating a T-Trellis for Optimal Cane Separation
The T-trellis opens the canopy like a V, directing fruiting canes outward for better light and easier picking. Suited for summer-bearing types, it takes 1 hour to build.
Supplies
- Two 6-foot T-posts or 4x4 wood posts
- Two 2x4 cross-arms (4-5 feet long)
- Four eye hooks and 50 feet wire
- Screws and clamps
Assembly Steps
- Set end posts: Drive posts 2 feet deep at bed ends, 12 feet apart. Angle slightly outward if using wood for V-effect.
- Attach cross-arms: Screw horizontal 2x4s to post tops, extending 1 foot beyond bed width (e.g., 3 feet for 24-inch bed).
- Install wires: Hook wires at 3 and 5 feet on each arm, stretching taut across. Use turnbuckles for tension.
- Train canes: Tie floricanes to outer wires, leave primocanes central. Rotate arms seasonally if advanced.
Benefits include higher yields (up to 20% more) from improved airflow, but start simple—fixed T without rotation for year one.
Planting and Training Your Raspberries on the Trellis
Once built, plant bare-root or potted raspberries in spring or fall, 18-24 inches apart in amended soil (pH 5.5-6.5, rich in compost). Mulch 3 inches deep to retain moisture. As shoots emerge, guide them upward: tuck between wires weekly. For thorny varieties, wear gloves. By midsummer, loosely tie with twine to prevent rubbing.
Water consistently (1 inch/week), fertilize with balanced organic feed in spring, and monitor for pests like Japanese beetles—neem oil works gently.
Pruning and Maintenance Essentials
Pruning keeps your trellis tidy. For everbearing: Cut all canes to 1 inch in late winter. For summer-bearing: Remove fruited floricanes post-harvest, thin primocanes to 4-6 per foot.
Annually inspect wires for sag (tighten turnbuckles), treat wood with linseed oil, and replace rusted parts. In snow-prone areas, add temporary cross-bracing. With care, your setup will thrive for a decade.
Avoiding Common Beginner Mistakes
Don't overcrowd—limit to 3-4 plants per 12 feet. Skip tying too tight; loose is best for growth. Build before planting to avoid root disturbance. If canes lean, reinforce posts early. Patience pays: First-year focus on establishment, not fruit.
Conclusion: Harvest the Rewards of Your Trellis
Building a raspberry trellis is a gateway to confident gardening. These designs transform chaotic canes into productive, picturesque rows, yielding pints of berries for pies, jams, and fresh snacking. Start small, experiment, and soon you'll share tips with fellow growers. Happy building—and even happier harvesting!