Ultimate Guide: How to Propagate Raspberry Plants for a Bountiful Harvest
Discover expert methods to propagate raspberry plants at home, from suckers and tip layering to root cuttings. Step-by-step guide for beginners to achieve a thriving berry patch effortlessly.
Introduction to Raspberry Propagation
Raspberries are one of the most rewarding fruits to grow in a home garden. Their juicy, sweet berries are perfect for fresh eating, jams, pies, and more. But did you know that propagating your own raspberry plants can save you money and allow you to expand your patch effortlessly? Whether you're a novice gardener or a seasoned horticulturist, learning how to propagate raspberries opens up endless possibilities for creating a thriving berry garden.
Propagation simply means creating new plants from an existing one. For raspberries, this is particularly straightforward because they naturally produce suckers, runners, and root systems that lend themselves to easy multiplication. In this comprehensive guide, we'll explore the most effective methods to propagate raspberry plants, step-by-step instructions, essential tips for success, and common pitfalls to avoid. By the end, you'll be equipped to multiply your raspberry bounty with confidence.
Why Propagate Raspberry Plants?
Before diving into the how-to, let's consider the why. Propagating raspberries offers several benefits. First, it's cost-effective; instead of purchasing new plants each season, you can generate dozens from a single healthy specimen. Second, it preserves the exact genetics of your favorite varieties, ensuring consistent flavor and yield. Third, raspberries are vigorous growers, and propagation helps manage their spread, preventing overcrowding while expanding your garden footprint.
Additionally, home propagation reduces the risk of introducing diseases from nursery stock. Raspberries are susceptible to issues like viral infections or fungal diseases, so starting from your own clean plants is a smart strategy. Finally, it's an engaging gardening project that connects you more deeply with your plants' life cycle, from root to ripe berry.
Understanding Raspberry Plant Types
Not all raspberries propagate the same way, so it's crucial to identify your plant type. Raspberries fall into two main categories: summer-bearing (floricanes) and everbearing (primocanes). Summer-bearing varieties produce fruit on second-year canes in early to mid-summer, while everbearing types yield on first-year canes in fall and sometimes a smaller crop in summer.
For propagation purposes, both types work well, but everbearing raspberries often propagate more vigorously due to their continuous growth. Black raspberries and purple hybrids (crosses between red and black) have slightly different needs, such as more acidic soil, but the core methods remain similar. Always check your plant's label or observe its fruiting pattern to tailor your approach.
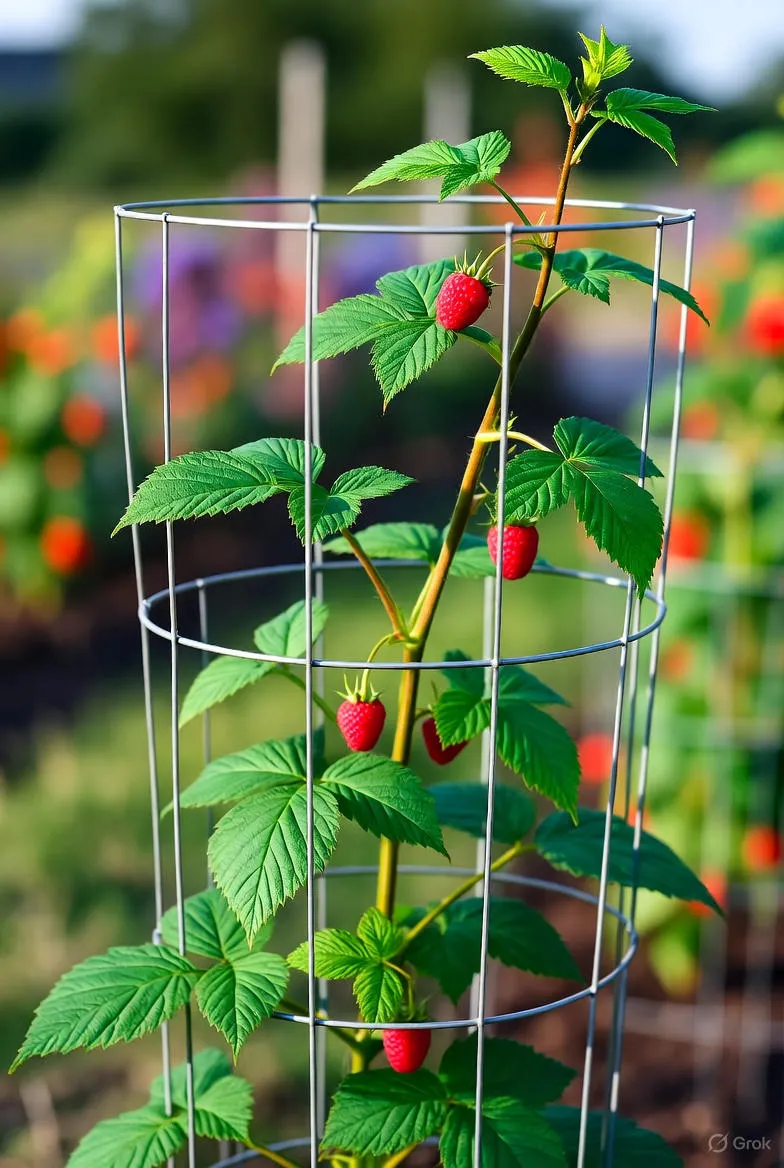
Method 1: Propagating via Suckers
Suckers are the most popular and easiest way to propagate raspberries. These are young shoots that emerge from the roots, often away from the parent plant. They're essentially clone babies, genetically identical to the mother plant.
Step-by-Step Guide to Sucker Propagation
- Timing: The best time is early spring, just as new growth emerges, or late fall after the leaves drop. Avoid midsummer heat to prevent stress.
- Selecting Suckers: Look for vigorous suckers about 6-12 inches tall with at least three buds and a healthy root ball. Choose those at least 1-2 feet from the parent to ensure they have developed roots.
- Digging Up: Use a sharp spade to dig a circle around the sucker, about 6 inches from its base. Gently lift it, keeping as much soil attached to the roots as possible. Shake off excess dirt but avoid damaging the fine roots.
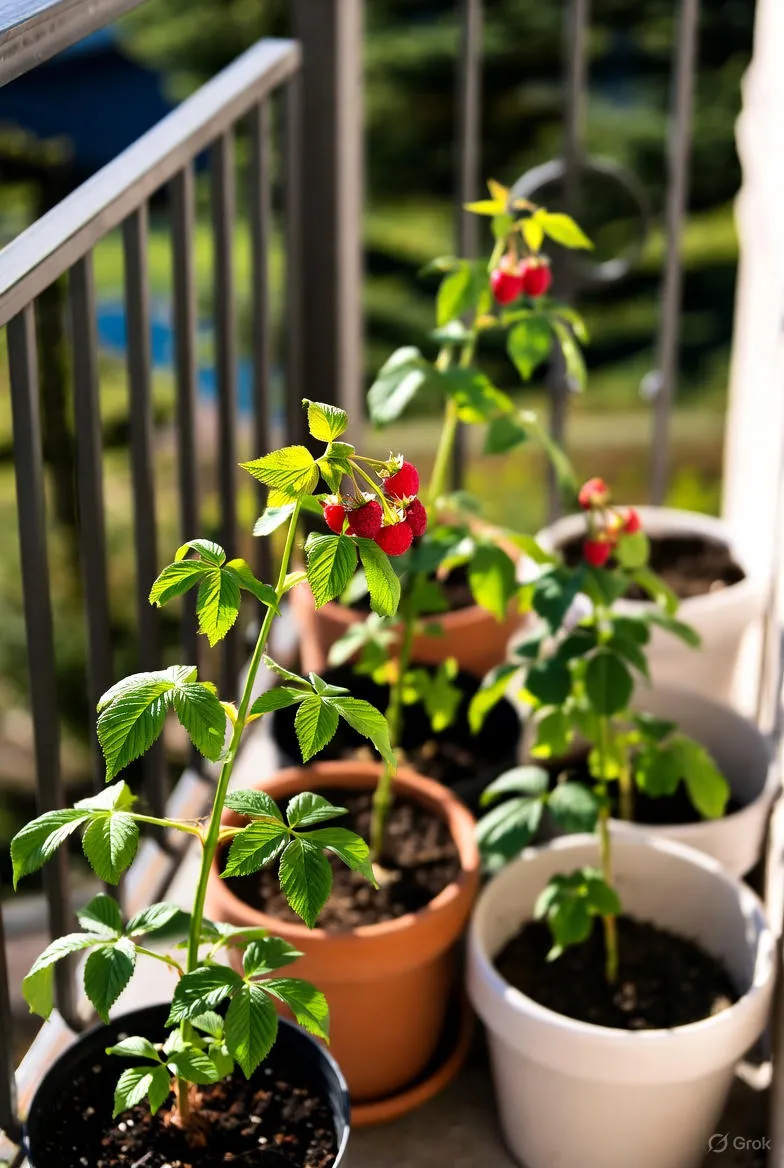
- Replanting: Prepare a new site with well-drained, loamy soil enriched with compost. Dig a hole twice as wide as the root ball and as deep. Place the sucker so the roots spread out, and backfill with soil, firming gently. Water thoroughly to settle the soil.
- Aftercare: Mulch around the base with 2-3 inches of organic material like straw to retain moisture and suppress weeds. Water regularly for the first few weeks, aiming for 1 inch per week. In the first year, pinch off any flowers to encourage root establishment.
This method yields a high success rate—up to 90% with proper care—and new plants can fruit within a year.
Method 2: Tip Layering for Raspberry Propagation
Tip layering leverages the plant's natural tendency to root at cane tips. It's ideal for red raspberries and requires minimal tools.
Step-by-Step Guide to Tip Layering
- Timing: Late summer to early fall, when canes are still flexible but growth has slowed.
- Selecting Tips: Choose healthy, non-fruiting primocanes (first-year canes) that are at least 2-3 feet tall. Avoid diseased or insect-damaged ones.
- Preparation: Bend the tip of the cane downward to the ground, about 6-8 inches from the soil surface. If needed, wound the tip lightly with a knife to encourage rooting.
- Securing: Dig a small hole (2-3 inches deep) where the tip touches the soil. Bury the tip and secure it with a U-shaped wire or rock. Leave the rest of the cane arched above ground.
- Waiting and Separating: Water well and keep moist. Roots should form in 4-6 weeks. Once established (test by gentle tugging), cut the new plant from the parent cane with pruners and transplant to its permanent spot.
- Aftercare: Similar to suckers: mulch, water, and protect from extreme weather. Expect fruit the following season.
Tip layering is forgiving for beginners, as the parent plant supports the new one until independence.
Method 3: Root Cuttings for Advanced Propagation
For those seeking precision, root cuttings involve harvesting sections of the root system. This method works best for black and purple raspberries but can be adapted for reds.
Step-by-Step Guide to Root Cuttings
- Timing: Dormant season—late winter to early spring—before buds swell.
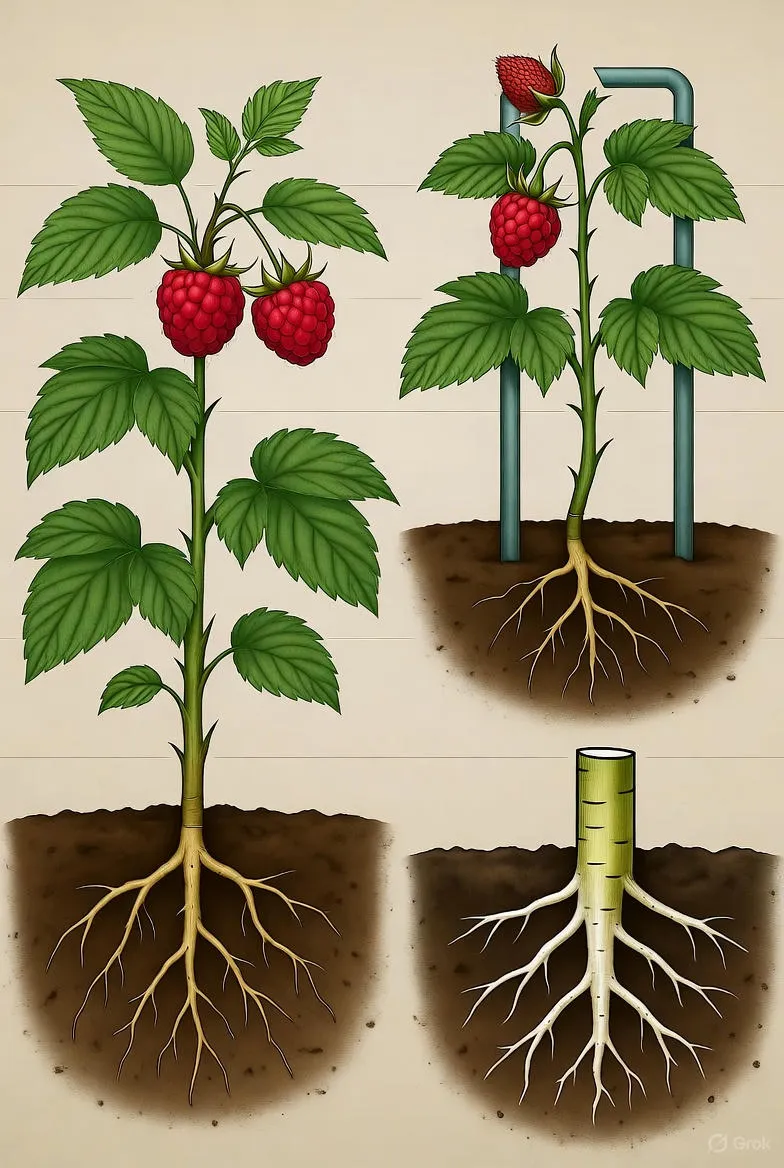
- Harvesting Roots: Carefully dig around the parent plant to expose pencil-thick roots (1/4 to 1/2 inch diameter). Cut sections 2-3 inches long, ensuring each has a bud or eye (swollen area).
- Preparation: Trim ragged ends and dust with rooting hormone powder (optional but boosts success).
- Planting: Fill pots with a sterile mix of sand and peat (1:1). Plant cuttings horizontally 1 inch deep, buds facing up. Water and cover with a plastic dome for humidity.
- Germination: Place in a cool, bright spot (not direct sun). Shoots emerge in 3-4 weeks; transplant outdoors after hardening off in late spring.
- Aftercare: Space plants 2-3 feet apart in rows 6-8 feet wide. Fertilize lightly with a balanced 10-10-10 in spring.
Root cuttings can produce 20-30 new plants from one harvest, making it efficient for large-scale expansion.
Method 4: Division of Established Clumps
If you have mature raspberry patches, division rejuvenates the plant while creating multiples. It's like giving your raspberries a fresh start.
Step-by-Step Guide to Division
- Timing: Early spring or fall, during dormancy.
- Assessing the Clump: Identify a 3-5 year-old patch that's become crowded. Healthy divisions should have multiple canes and roots.
- Digging and Separating: Lift the entire clump with a spade, shaking off soil. Use a sharp knife or pruners to divide into sections, each with 3-5 canes and a robust root system.
- Replanting: Enrich soil with aged manure. Plant divisions at the same depth as before, spreading roots. Water deeply.
- Aftercare: Prune back canes to 6 inches post-planting. Monitor for pests like Japanese beetles.
Division not only propagates but also improves yield by reducing competition.
Essential Tips for Successful Raspberry Propagation
To maximize your efforts, consider these pro tips:
- Soil Preparation: Raspberries thrive in pH 5.5-6.5 soil. Test and amend with lime or sulfur as needed. Incorporate 2-4 inches of compost for nutrients.
- Watering Wisdom: Consistent moisture is key, especially in the first year. Drip irrigation prevents leaf diseases.
- Trellising: Support canes with wires or fences to promote air circulation and ease harvesting.
- Pest and Disease Prevention: Start with certified disease-free stock. Rotate propagation sites every 3-4 years. Use neem oil for aphids.
- Winter Protection: In zones 4-7, mulch heavily to insulate roots against freezes.
Common Mistakes to Avoid
Even experienced gardeners slip up. Here's how to sidestep pitfalls:
- Overwatering: Leads to root rot. Let soil dry slightly between waterings.
- Poor Site Selection: Avoid low-lying, waterlogged areas. Full sun (6-8 hours) is essential.
- Neglecting Pruning: Post-propagation, thin canes to 4-6 per foot for vigor.
- Impatient Transplanting: Wait for strong roots; rushing causes failure.
- Ignoring Varieties: Some, like 'Heritage' everbearing, root faster than others.
Harvesting and Maintaining Your New Plants
Once established, your propagated raspberries will reward you generously. Harvest when berries slip easily from the core—typically July for summer types, August-October for everbearing. Pick every 2-3 days to encourage production.
Annual maintenance includes spring fertilizing, summer mulching, and fall cleanup to remove old canes. With proper care, a single plant can yield 1-2 quarts per season, and propagated patches can expand exponentially.
Advanced Techniques and Variations
For enthusiasts, explore tissue culture for virus-free clones or micropropagation in labs, though these are more complex. Grafting raspberries onto blackberry rootstock can enhance disease resistance, but it's experimental for home use.
Experiment with companion planting: garlic or marigolds deter pests, while nitrogen-fixing beans boost soil health.
Conclusion: Grow Your Raspberry Empire
Propagating raspberry plants is a gateway to sustainable, flavorful gardening. From simple suckers to intricate root cuttings, each method offers a path to abundance. Start small, observe your plants' responses, and soon you'll have a self-sustaining berry haven. Happy propagating—may your garden overflow with ruby-red treasures!
(Word count: 1,248)