Ultimate Guide to Installing a Raspberry Trellis: Step-by-Step Instructions for Bountiful Harvests
Learn how to install a sturdy raspberry trellis with our step-by-step guide. Boost yields, improve health, and simplify harvesting for your berry patch. Essential tips for beginners and pros.
Introduction to Raspberry Trellises
Raspberry plants are a delightful addition to any garden, offering delicious, nutrient-rich berries that can be enjoyed fresh or preserved. However, these vigorous growers can quickly become unruly without proper support. A well-constructed trellis not only keeps your raspberry canes organized and upright but also improves air circulation, reduces disease risk, and makes harvesting easier. In this comprehensive guide, we'll walk you through everything you need to know about installing a raspberry trellis, from selecting the right design to long-term maintenance. Whether you're a novice gardener or a seasoned enthusiast, these steps will help you create a sturdy structure that supports your plants through seasons of growth.
Why Your Raspberries Need a Trellis
Raspberries are perennial plants that produce long, flexible canes which can reach heights of 6 to 8 feet. Without support, these canes sprawl across the ground, leading to tangled growth, increased susceptibility to pests and fungal diseases like anthracnose or verticillium wilt, and difficulty in accessing ripe fruit. A trellis system encourages vertical growth, allowing sunlight to penetrate the canopy and promoting even ripening. Studies from agricultural extensions, such as those from Cornell University, show that trellised raspberries can yield up to 20-30% more fruit per plant compared to unsupported ones. Additionally, it simplifies pruning, as you can easily distinguish between fruiting and new growth canes.
Beyond productivity, a trellis enhances the aesthetic appeal of your garden. Imagine neat rows of lush green foliage dotted with vibrant red, gold, or black berries—it's both functional and visually stunning. For those with limited space, a trellised setup maximizes your garden's footprint, turning a small plot into a high-yield berry patch.
Choosing the Right Trellis Design for Raspberries
Not all trellises are created equal, and selecting the appropriate one depends on your raspberry variety—summer-bearing (floricanes) or everbearing (primocanes)—as well as your garden's layout. For most home gardeners, a simple V-trellis or T-trellis works wonders. The V-design, with two angled wires forming a V shape, is ideal for trailing varieties like black raspberries, while the T-trellis, featuring horizontal wires supported by a crossbar, suits upright types such as red raspberries.
Consider your climate too. In windy areas, opt for a more robust frame using metal posts to withstand gusts. For sloped gardens, a hill-style trellis that follows the terrain prevents soil erosion. Always aim for a structure that allows at least 3-4 feet of width between rows to facilitate access for weeding and picking.
Pros and Cons of Popular Trellis Types
- V-Trellis: Excellent for air flow; easy to install; best for trailing canes. Cons: May require more frequent tying.
- T-Trellis: Provides strong support for heavy fruit loads; simple materials. Cons: Slightly more complex assembly.
- Post and Wire: Budget-friendly and customizable; great for long rows. Cons: Less stable in high winds without reinforcements.
Whichever you choose, ensure it's scalable. Start small if you're new to gardening, and expand as your raspberry patch grows.
Gathering Materials and Tools
Before diving into installation, assemble your supplies. For a basic 10-foot row trellis supporting 5-6 plants, you'll need:
- Two 6-foot wooden or metal posts (4x4 inches for wood, or T-posts for metal).
- Galvanized wire (12-14 gauge) for horizontal supports—about 50 feet total.
- Wire ties or twine for securing canes.
- Concrete mix or gravel for post stability (optional but recommended).
- End post braces if your row is longer than 10 feet.
Tools-wise, keep it straightforward:
- Post hole digger or auger for digging 2-3 feet deep holes.
- Level to ensure posts are plumb.
- Pliers or wire cutters for tensioning wires.
- Hammer or mallet for driving posts.
- Tape measure for precise spacing.
Source materials from local hardware stores or online garden suppliers. Opt for rust-resistant options to extend the trellis's lifespan, especially in humid environments where corrosion is a concern.
Step-by-Step Installation Guide
Installing your raspberry trellis is a weekend project that yields years of benefits. Follow these detailed steps for a secure setup.
Step 1: Planning and Site Preparation
Choose a sunny location with well-drained soil, ideally receiving 6-8 hours of direct sunlight daily. Mark your row ends with stakes and string to visualize the layout. Space posts 10-15 feet apart, depending on your row length. Clear the area of weeds and debris, and test soil pH—raspberries thrive at 5.5-6.5.
Step 2: Digging Post Holes
Dig holes at each end of your row, aiming for 2-3 feet deep and 8-12 inches wide. Deeper holes provide better anchorage against wind and the weight of fruit-laden canes. If your soil is rocky, use a manual digger; for clay-heavy ground, wet the soil slightly to ease digging. Space holes according to your design—closer for V-trellises (8 feet) and wider for T-styles (12-15 feet).
Step 3: Setting the Posts
Place posts in holes, using a level to check vertical alignment on two sides. For wooden posts, brace them temporarily with stakes. Pour concrete around the base, filling to 4-6 inches below ground level, and tamp down for solidity. Let cure for 24-48 hours. Metal T-posts can be driven directly with a post driver, but add guy wires for extra stability in exposed sites.
Step 4: Attaching the Crossbar (For T-Trellis)
If using a T-design, secure a horizontal 2x4 board across the tops of the posts with galvanized brackets or screws. This crossbar will hold the wires aloft. Ensure it's level and firmly attached—wobbly crossbars lead to sagging wires over time.
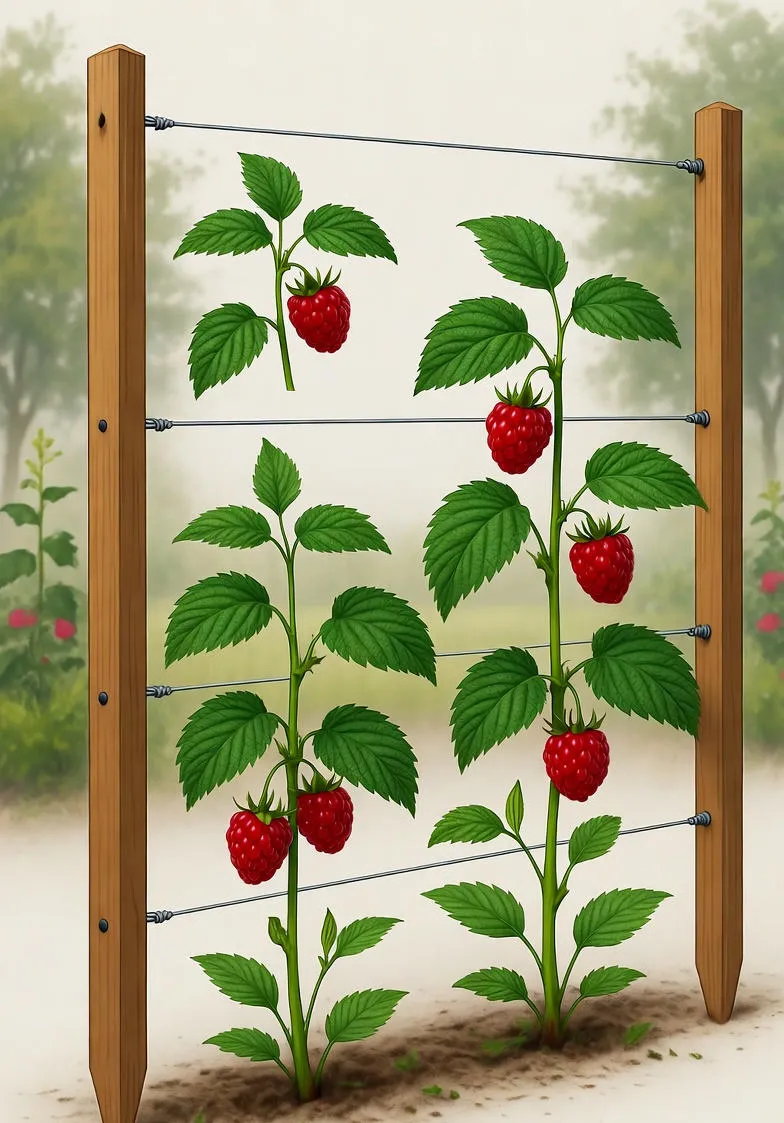
Step 5: Stringing the Wires
Run horizontal wires at intervals: lowest at 2 feet from ground for young canes, then every 18-24 inches up to 5-6 feet. For a V-trellis, angle wires outward from the center post. Use turnbuckles or eye bolts at ends to tension wires snugly but not rigidly—allow slight give to prevent breakage. Twist wires around posts or use clips for secure fastening. Double-check tension by plucking; it should hum like a guitar string.
Step 6: Planting and Training Initial Canes
Plant raspberry roots 2-3 feet from posts, spacing plants 2-3 feet apart. As canes emerge, gently tie them to the lowest wire using soft twine or plant clips. Train primocanes (new growth) to one side and floricanes to the other for organized pruning later.
With these steps complete, your trellis is ready to support a thriving raspberry patch. Total time: 4-6 hours, plus curing.
Maintenance and Care for Your Raspberry Trellis
A trellis is only as good as its upkeep. Annually inspect for loose wires or leaning posts, tightening as needed. In fall, after harvest, prune spent canes and mulch around the base to suppress weeds and retain moisture. Winterize by wrapping posts in burlap if frost heaving is an issue.
Monitor for pests like Japanese beetles, which love raspberry foliage—handpick or use organic sprays. Fertilize sparingly with a balanced 10-10-10 in spring, avoiding excess nitrogen that promotes leafy growth over fruit. Water consistently, providing 1-2 inches weekly, more during dry spells or fruiting.
Seasonal Checklist
- Spring: Tie new canes; apply mulch.
- Summer: Harvest regularly; watch for diseases.
- Fall: Prune and clean up debris.
- Winter: Reinforce structure if needed.
Proper care ensures your investment pays off with bumper crops year after year.
Common Mistakes to Avoid
Even experienced gardeners slip up. Don't skimp on post depth—shallow sets topple easily. Avoid over-tensioning wires, which snap under load, or under-tensioning, leading to tangles. Planting too close to the trellis crowds growth; maintain that 2-foot buffer. Finally, ignoring pruning turns your tidy row into a bramble jungle—schedule it religiously.
By steering clear of these pitfalls, you'll enjoy hassle-free raspberry cultivation.
Advanced Tips for Maximizing Yields
For the ambitious, integrate companion planting: garlic or marigolds at the base deter nematodes. Experiment with espalier techniques on walls for urban spaces. Track your setup's performance in a garden journal, noting varieties and yields to refine future seasons. Sustainable tweaks like using recycled posts or natural twine align with eco-friendly gardening.
Engage your community—join local gardening clubs for trellis-building workshops or berry swaps. With innovation, your raspberry trellis becomes a cornerstone of a self-sufficient homestead.
Conclusion
Installing a raspberry trellis transforms chaotic canes into a productive powerhouse, rewarding you with armfuls of sweet berries. From site prep to seasonal TLC, each step builds toward healthier plants and easier harvests. Roll up your sleeves, gather your tools, and get building—your garden (and taste buds) will thank you. Happy gardening!