The Ultimate Guide to Soaking and Rinsing Leafy Vegetables: Hygiene, Freshness, and Safety
Learn the essential 'Soak, Swish, and Lift' method for cleaning leafy greens. Remove dirt, pesticides, and bugs effectively while keeping your vegetables crisp and fresh.
Leafy greens are the nutritional powerhouses of the culinary world. From the iron-rich depths of spinach and kale to the delicate crunch of butter lettuce and arugula, these vegetables are essential for a healthy diet. However, they also pose a unique challenge in the kitchen: they are grown directly in the soil, often eaten raw, and their complex textures provide the perfect hiding spots for dirt, grit, insects, and potentially harmful bacteria.
Many home cooks underestimate the importance of a proper washing technique. A quick rinse under the tap is rarely sufficient to remove the stubborn grit clinging to the crevices of kale or the microscopic pathogens that may be residing on your romaine. Furthermore, improper washing can actually increase the risk of cross-contamination or lead to limp, unappetizing salads.
This comprehensive guide will walk you through the science and art of soaking and rinsing leafy vegetables. We will cover everything from the standard immersion method to advanced techniques for removing pesticides, ensuring your greens are not only safe to eat but also retain their peak texture and flavor.
Why the "Quick Rinse" Isn't Enough
Before diving into the methods, it is crucial to understand what we are trying to remove. Leafy greens are unique because their surface area is massive compared to their volume. The ruffled edges of kale, the tightly packed heads of iceberg lettuce, and the delicate leaves of cilantro act as traps for contaminants.
- Physical Debris: Sand, soil, and grit are the most obvious offenders. There is nothing that ruins a dining experience faster than crunching down on a grain of sand in a salad.
- Agrochemicals: Unless you are growing your own greens or buying strictly organic, pesticide residues can remain on the surface of the leaves. Even organic produce can carry residues from approved organic pesticides or drift from nearby conventional farms.
- Pathogens: E. coli, Salmonella, and Listeria are bacteria frequently associated with outbreaks linked to leafy greens. These can come from contaminated irrigation water, soil amendments, or handling during harvest.
- Insects: Aphids, thrips, and small slugs often make their homes inside the folds of leafy vegetables.
A stream of running water might push large debris off the surface, but it often fails to dislodge contaminants hidden deep within the folds or neutralize bacteria attached to the leaf surface. This is why soaking—and specifically, the method of soaking—is paramount.
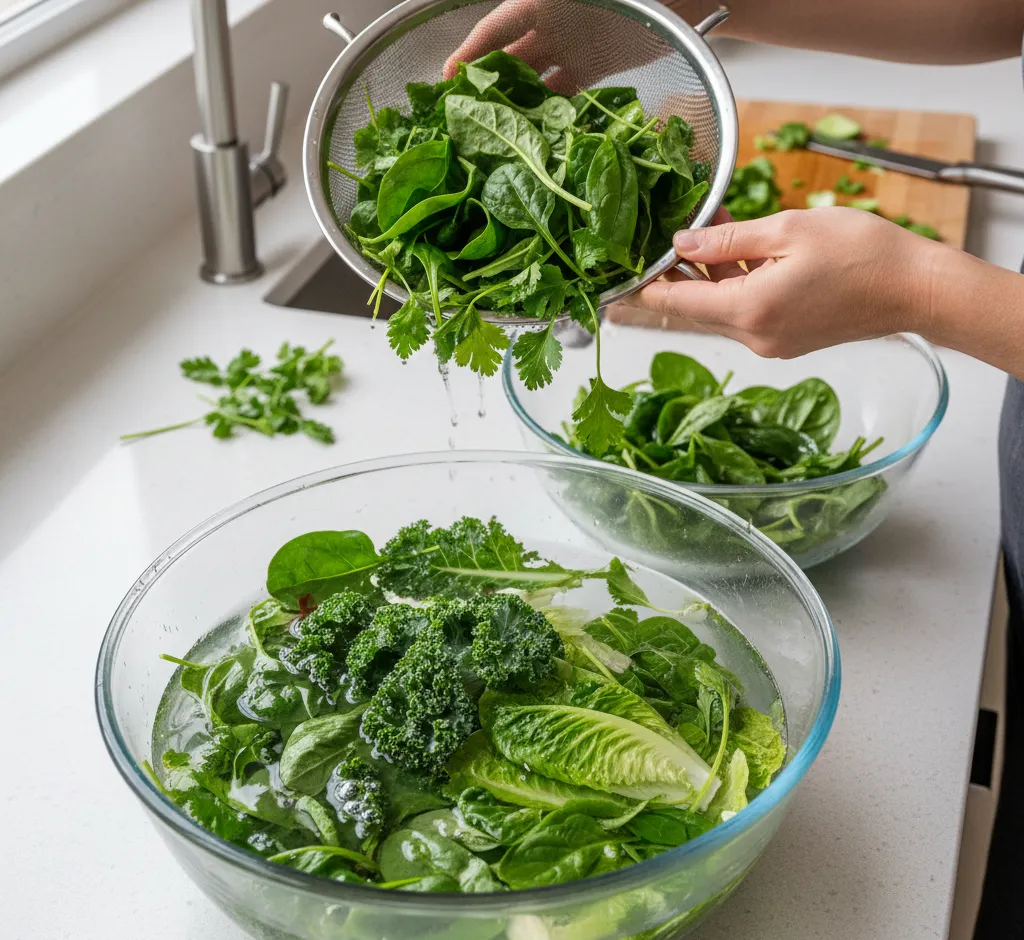
The Golden Standard: The Immersion and Lift Method
The most effective way to clean leafy greens is not under a running faucet, but in a large volume of standing water. This method allows gravity to work in your favor. The goal is to dilute the dirt and allow it to settle at the bottom of the vessel, away from your food.
Step 1: Preparation and Separation
Begin by washing your hands thoroughly. It is counterproductive to wash vegetables with dirty hands. Next, sanitize your sink or the large bowl you intend to use. If you are using the kitchen sink, scrub it down with hot, soapy water and rinse it well before filling it with greens.
Prepare your greens. For head lettuce (like Iceberg or Romaine), remove the core and separate the leaves. Washing a whole head is ineffective because water cannot penetrate the tightly packed inner layers. For hardy greens like kale or collards, strip the leaves from the tough stems. Discard any wilted, slimy, or yellowed leaves immediately, as these can harbor higher bacterial loads and accelerate spoilage of the clean greens.
Step 2: The Cold Water Bath
Fill your clean sink or a very large mixing bowl with cold water. The temperature matters; warm water can cause delicate leaves to wilt and lose their crunch. Cold water helps crisp up the cells of the plant through rehydration.
Submerge the greens completely. Do not overcrowd the bowl; the leaves need room to move. If you have a large quantity, wash them in batches. Once submerged, use your hands to gently but vigorously agitate the greens. Swish them around in the water. This mechanical action helps loosen dirt and debris that may be stuck to the leaves.
Step 3: The Soak
Let the greens sit undisturbed in the water for 5 to 10 minutes. This resting period is vital. It allows dried earth to rehydrate and fall away, and it gives any sand or grit time to sink to the bottom of the basin. If you are dealing with particularly buggy greens (like organic kale or broccoli rabe), you might add a pinch of salt to the water, which can help drive insects out of the crevices.
Step 4: The Lift (Crucial Step)
This is where most people make a mistake. Do not drain the water while the greens are still in the bowl/sink. If you pour the water out with the greens, all the dirt and sand that settled at the bottom will simply redeposit onto the leaves.
Instead, use your hands or a large spider strainer to gently lift the greens out of the water and transfer them to a colander or a clean bowl. Look at the water remaining in the sink; you will likely see sediment at the bottom. That is exactly what you want to avoid.
Step 5: Repeat as Necessary
If the water was visibly dirty, drain the sink, rinse it, refill it with fresh cold water, and repeat the process. For spinach and leeks, which are notoriously sandy, you may need to repeat this process two or three times until the water remains perfectly clear.
Advanced Cleaning: Vinegar, Salt, and Baking Soda
While cold water is sufficient for removing dirt, many cooks are concerned about pesticides and bacteria. Here is the breakdown of additives you can use during the soak phase.
The Baking Soda Method (For Pesticides)
Recent studies, including research from the University of Massachusetts, suggest that a solution of sodium bicarbonate (baking soda) is more effective at removing pesticide residues than tap water or bleach solutions. The alkaline nature of baking soda helps break down certain chemicals.
How to do it: Dissolve 1 teaspoon of baking soda for every 2 cups of water. Soak the greens for 12–15 minutes, then rinse thoroughly with fresh water to remove the salty/soapy taste of the soda.
The Vinegar Soak (For Bacteria)
White vinegar is a popular natural disinfectant. While it won't sterilize your vegetables like irradiation would, it can reduce surface bacteria. A ratio of 1 part vinegar to 3 parts water is generally recommended. However, be cautious: soaking delicate greens in vinegar for too long can affect their texture and flavor, essentially starting the pickling process. If you use vinegar, a thorough final rinse is mandatory.
Vegetable Wash Sprays
Commercial vegetable washes are available, but they are often expensive and unnecessary. Studies have shown that they are rarely more effective than the baking soda method or even a rigorous water scrub. Stick to the homemade solutions to save money and avoid introducing unknown surfactants to your food.
Drying: The Key to Longevity and Flavor
Once your greens are clean, the job is only half done. Drying is arguably as important as washing. Wet greens are a problem for two reasons:
- Dressing Adhesion: Oil and water do not mix. If your salad leaves are wet, your vinaigrette will slide right off, pooling at the bottom of the bowl and leaving you with a bland salad.
- Bacterial Growth: Moisture promotes rot. Wet greens stored in the fridge will turn into a slimy, brown mess within 24 hours.
The Salad Spinner
The salad spinner is not a unitasker gadget; it is an essential tool for anyone who eats vegetables. It uses centrifugal force to pull water off the leaves without crushing them. Do not overload the spinner. Spin in batches, emptying the water reservoir between spins.
The Towel Method
If you do not own a spinner, lay out a large, clean kitchen towel (or layers of paper towels). Spread the wet greens in a single layer over the towel. Roll the towel up gently like a jelly roll/roulade with the greens inside. Press gently to absorb moisture. Unroll and let them air dry for a few more minutes if necessary.
Handling Specific Types of Greens
Delicate Greens (Spinach, Arugula, Spring Mix)
Handle these with kid gloves. The cell walls are fragile and bruise easily. When agitating in the water, use a gentle swirling motion rather than a rough scrub. Limit soaking time to 5 minutes to prevent waterlogging.
Hardy Greens (Kale, Collards, Swiss Chard)
These leaves are tough and often have a waxy coating. You can be more aggressive when swishing them in the water. You should also use your fingers to rub the surface of the leaves underwater to help dislodge aphids or soil stuck in the curly edges.
Cruciferous Vegetables (Broccoli, Cauliflower)
While not strictly "leafy," these are often treated similarly. Because the florets are so dense, soaking is mandatory. Immerse them upside down (florets in the water) for at least 10 minutes. This is where a saltwater soak is highly recommended to drive out worms or bugs hiding deep inside the stalks.
Herbs (Parsley, Cilantro, Dill)
Soft herbs should be treated like delicate flowers. Wash them gently. Unlike hardy greens, you should never store herbs wet. They must be bone dry before going into the fridge, or they will turn black.
The Myth of "Triple-Washed" Bagged Greens
Many consumers rely on bagged salad mixes labeled as "triple-washed" or "ready-to-eat." The FDA guidelines actually suggest not re-washing these greens. The logic is that these greens are washed in industrial facilities with sanitizers. If you wash them at home in a sink that hasn't been perfectly sanitized, you run the risk of introducing bacteria to a product that was previously safe.
However, if you buy bagged greens that are not explicitly labeled as ready-to-eat, or if the bag is damaged, you must wash them. Use your best judgment. If the greens look slimy or smell off, washing won't save them—throw them away.
Storage: Keeping Clean Greens Fresh
After the effort of soaking, rinsing, and drying, proper storage ensures your hard work pays off throughout the week.
The goal of storage is to maintain humidity while minimizing standing moisture and allowing for some airflow. The best method is the Paper Towel + Container technique.
- Line a large storage container (glass or BPA-free plastic) with a dry paper towel.
- Place your dried greens loosely inside. Do not pack them down.
- Place another paper towel on top of the greens.
- Snap the lid on.
The paper towels regulate moisture, absorbing any condensation that forms so it doesn't sit on the leaves, while the closed container keeps the greens from drying out in the arid environment of the refrigerator. Using this method, hearty lettuces like Romaine can stay crisp for up to two weeks, and delicate spinach can last up to a week.
Conclusion
Learning how to soak and rinse leafy vegetables is a foundational kitchen skill that bridges the gap between good intentions and healthy living. While it may seem faster to rinse a handful of kale under the tap, the immersion method provides a superior clean, removing the grit and residues that compromise the quality of your meals.
By incorporating the "Soak, Swish, and Lift" technique into your routine, you ensure that your salads are not only safe and free of debris but also texturally superior. The result is a meal that tastes better, lasts longer, and supports your health in the way nature intended. So, fill up that bowl, let the greens swim, and enjoy the crisp, clean taste of properly prepared vegetables.